Video Camera
Network connection setting on the PC
1. Switch on the Omnicomm OKO video terminal power
2. Connect the video terminal to a PC via Ethernet interface using a LAN adapter and a patch cord delivered with the video terminal
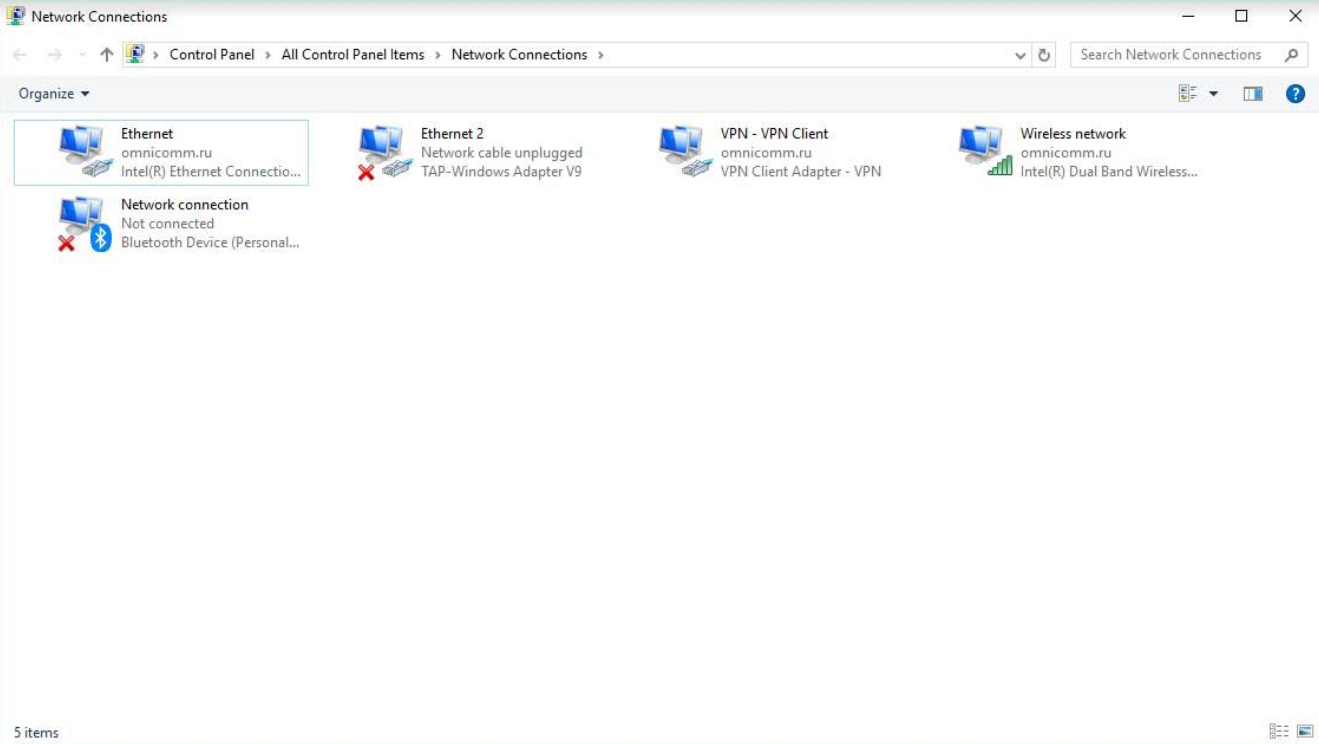
3. Open the adapter network settings window by running “Control Panel / Network and Internet / Network Connections”:
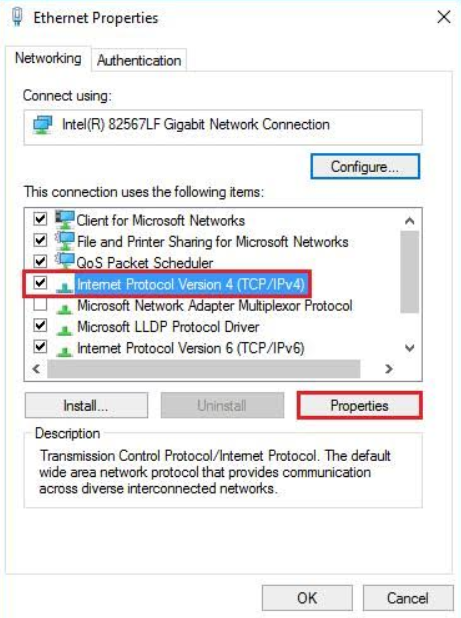
4. Open the connection properties window by right-clicking the mouse and selecting “Properties”:
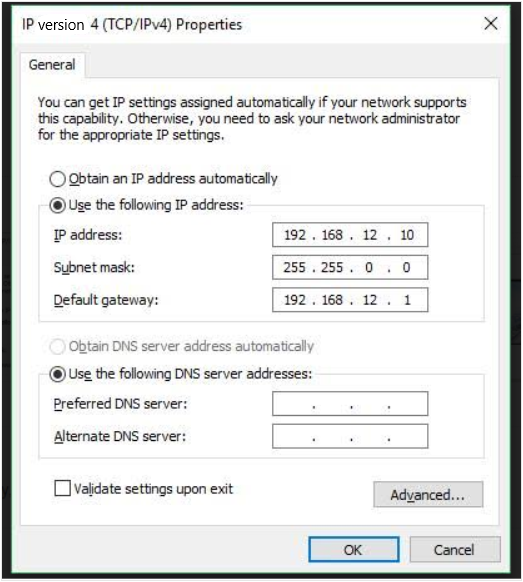
5. Select Internet Protocol Version 4 (TCP/IPv4), press “Properties”, and set the following configuration:
6. Press “OK”
Browser setting
1. Connect the video camera to any video terminal connector (“CAM1” – “CAM4”)
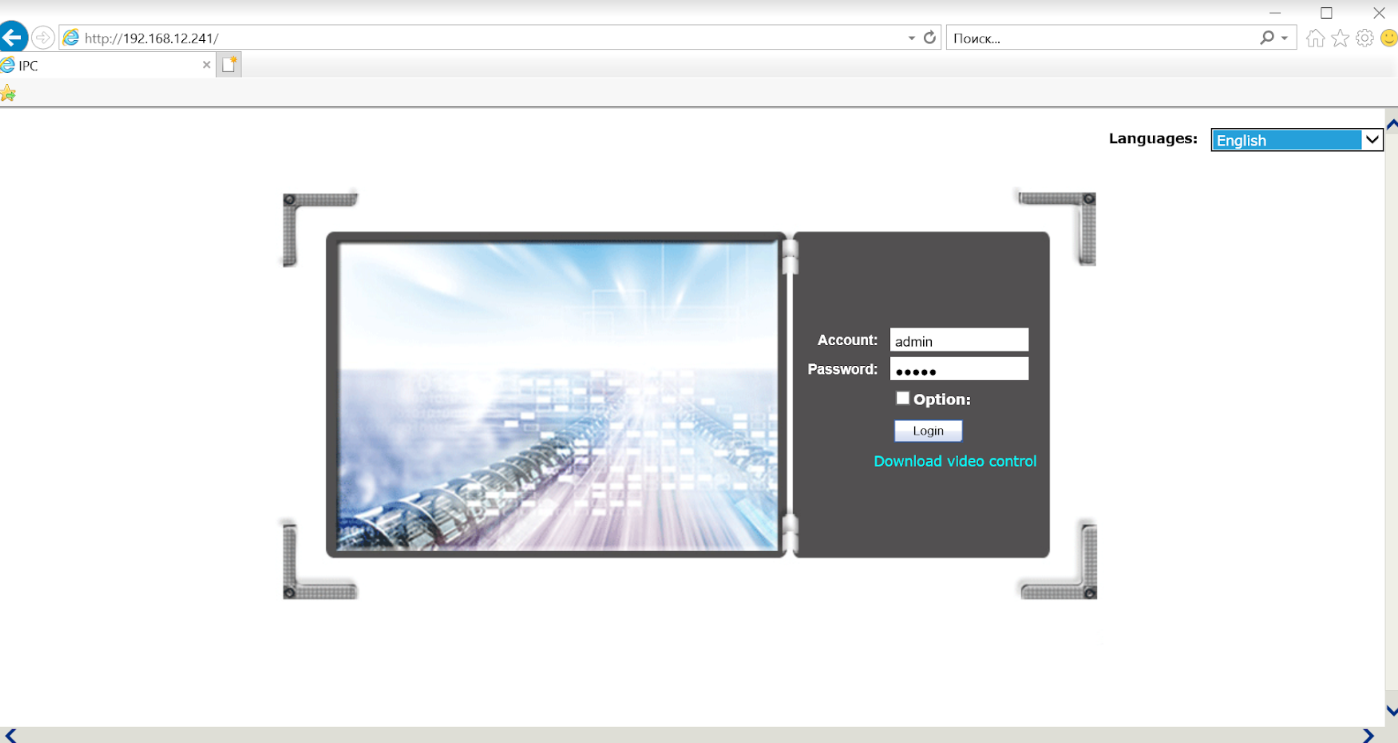
2. Open Internet Explorer and enter the camera configuration address. By default: 192.168.12.241
3. A window will open to confirm ie.exe installation:
4. Press “OK” and follow the installer's tips
5. Refresh the page or restart the browser
6. You will be prompted to enable the Active X add-on:
7. Press “Allow”
The browser will be configured only once, ie.exe reinstallation is not required.
Omnicomm OKO video camera setting
Each video camera is connected and configured individually in turns. Only one camera may be connected at a time.
1. Switch on the Omnicomm OKO video terminal power
2. Connect the video terminal to a PC via Ethernet interface using a LAN adapter and a patch cord delivered with the video terminal
3. Connect the video camera to any video terminal connector (“CAM1” – “CAM4”)
4. In your browser, enter the video camera configuration interface address – 192.168.12.241
In the “Account” and “Password”, enter “admin”.
Press the “Log in” button.
5. In the “Settings” / “TCP / IP setting” section:
Set the IP address in the corresponding field, depending on the connector the camera is plugged in:
“CAM1”: 192.168.12.241
“CAM2”: 192.168.12.242
“CAM3”: 192.168.12.243
“CAM4”: 192.168.12.244
When several cameras are connected to the video terminal, their IP addresses must be different.
Omnicomm OKO video terminal setting
- Connect the OKO video terminal to a PC using a mini USB – USB cable
- Run Omnicomm Configurator.
In the “Settings” tab select the “Video” section from the list:
In the “Channel Name” fields enter the name to be applied to the video, to identify the camera. Use Latin characters and digits only. Maximum number of characters – 13.
Restart the Omnicomm OKO video terminal after setting up the cameras.
The time on video files received from the camera is displayed in UTC+0 format.
Omnicomm OKO video camera connection and installation
1. Select the required patch cord length
2. At the video camera side:
- Pass the patch cord through the connector as shown in figure:
- Clamp the patch cord with RJ-45 connector using a crimper as per the CAM pins assignment shown in Connector Pin Assignment
3. At the Omnicomm OKO video terminal side:
- Pass the patch cord through the connector as shown in figure:
- Clamp the patch cord with RJ-45 connector using a crimper as per the CAM pins assignment shown in Connector Pin Assignment
- Plug the camera into the connector corresponding to the set channel
4. Remove the protective film from the camera base
5. Fix the camera on a flat surface
The camera may also be installed using self-tapping screws. To do this, remove the camera’s protective housing and fix it on the surface through the holes in the housing base.
We recommend that you use a multicore twisted pair intended for outdoor use, as a patch cord.


