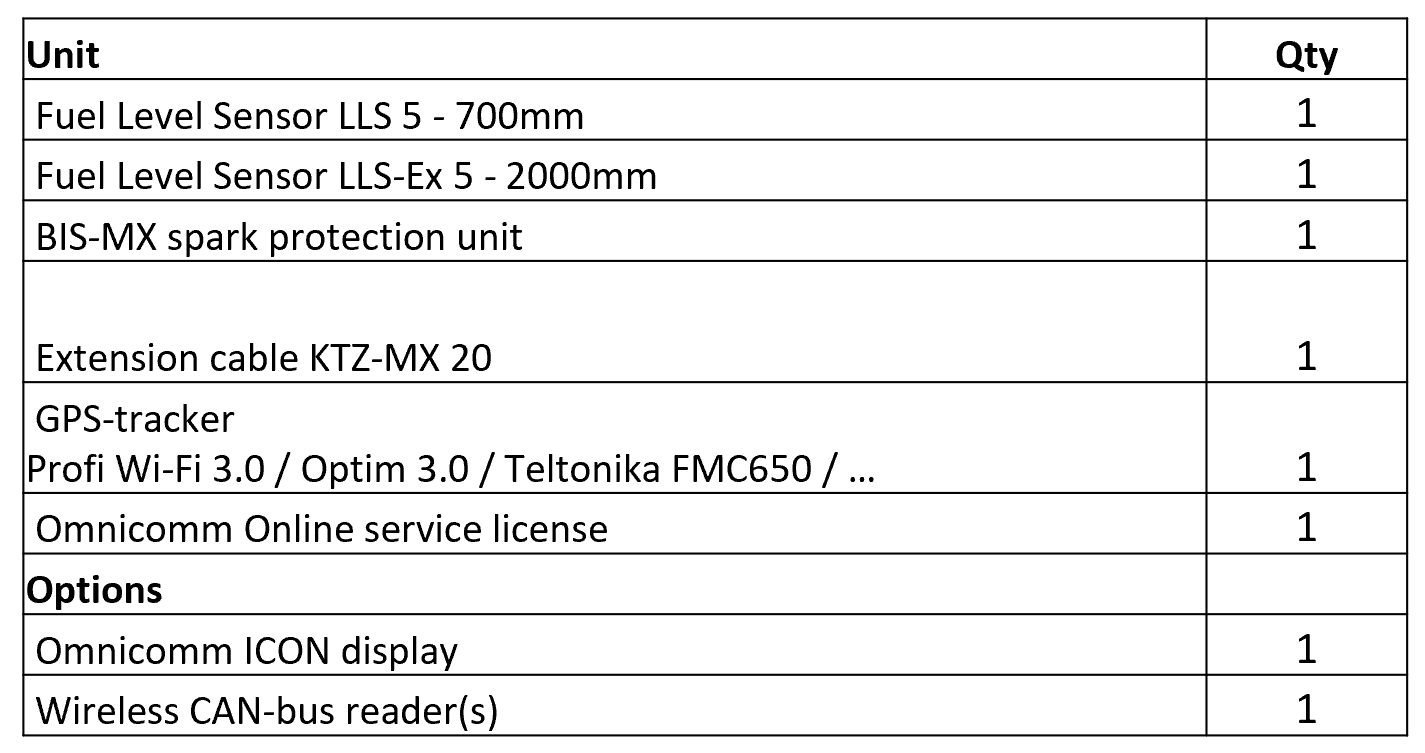
Connectivity
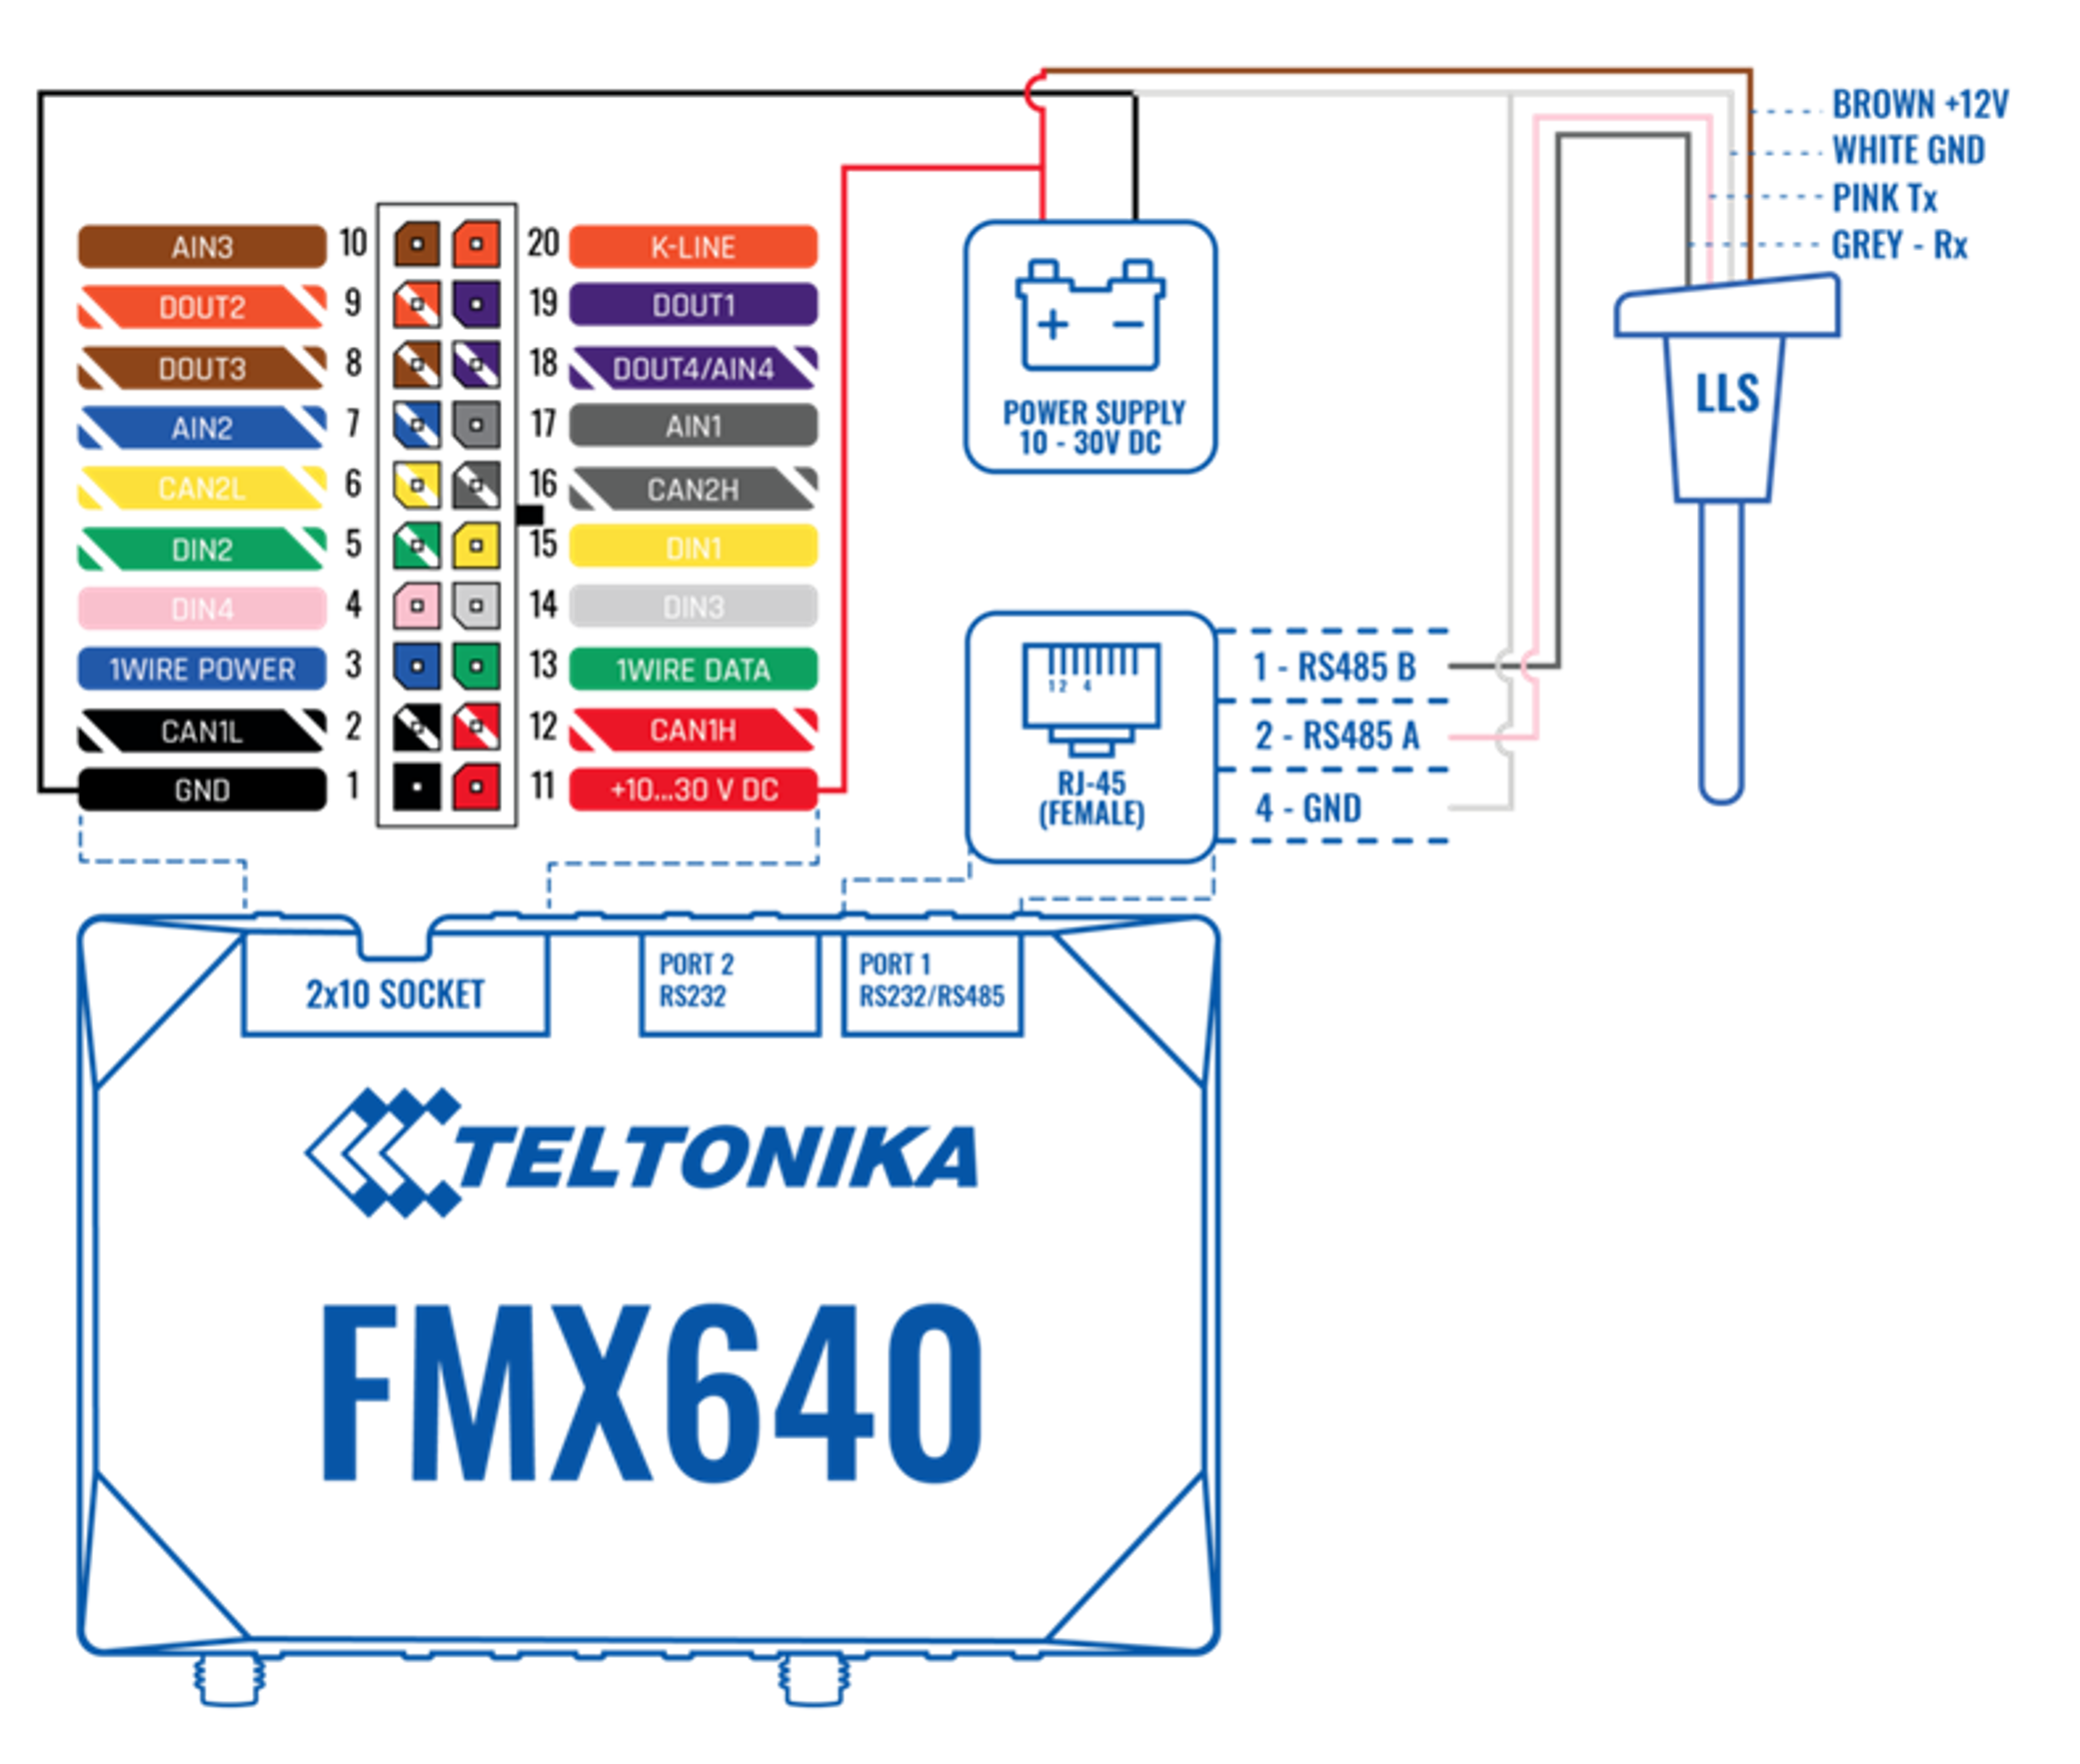
Step 2: Fuel Sensor Connection
FMC 650 MOUNTING RECOMMENDATIONS
CONNECTING WIRES
- Wires should be fastened to the other wires or non-moving parts. Try to avoid heat emitting and moving objects near the wires.
- The connections should not be seen very clearly. If factory isolation was removed while connecting wires, it should be applied again.
- If the wires are placed in the exterior or in places where they can be damaged or exposed to heat, humidity, dirt, etc., additional isolation should be applied.
- Wires cannot be connected to the board computers or control units.
CONNECTING POWER SOURCE
- Be sure that after the car computer falls asleep, power is still available on chosen wire. Depending on car, this may happen in 5 to 30 minutes period.
- When module is connected, measure voltage again to make sure it did not decrease.
- It is recommended to connect to the main power cable in the fuse box.
- Use 3A, 125V external fuse.
CONNECTING IGNITION WIRE
- Be sure to check if it is a real ignition wire i. e. power does not disappear after starting the engine.
- Check if this is not an ACC wire (when key is in the first position, most of the vehicle electronics are available).
- Check if power is still available when you turn off any of vehicles devices.
- Ignition is connected to the ignition relay output. As alternative, any other relay, which has power output when ignition is on, may be chosen.
CONNECTING GROUND WIRE
- Ground wire is connected to the vehicle frame or metal parts that are fixed to the frame.
- If the wire is fixed with the bolt, the loop must be connected to the end of the wire.
- For better contact scrub paint from the spot where loop is going to be connected.
Connect Omnicomm LLS sensors to the RS485 (RJ45) port using the appropriate connector.*
*A cable with an RJ-45 connector is not included in the FMC650 delivery pack.
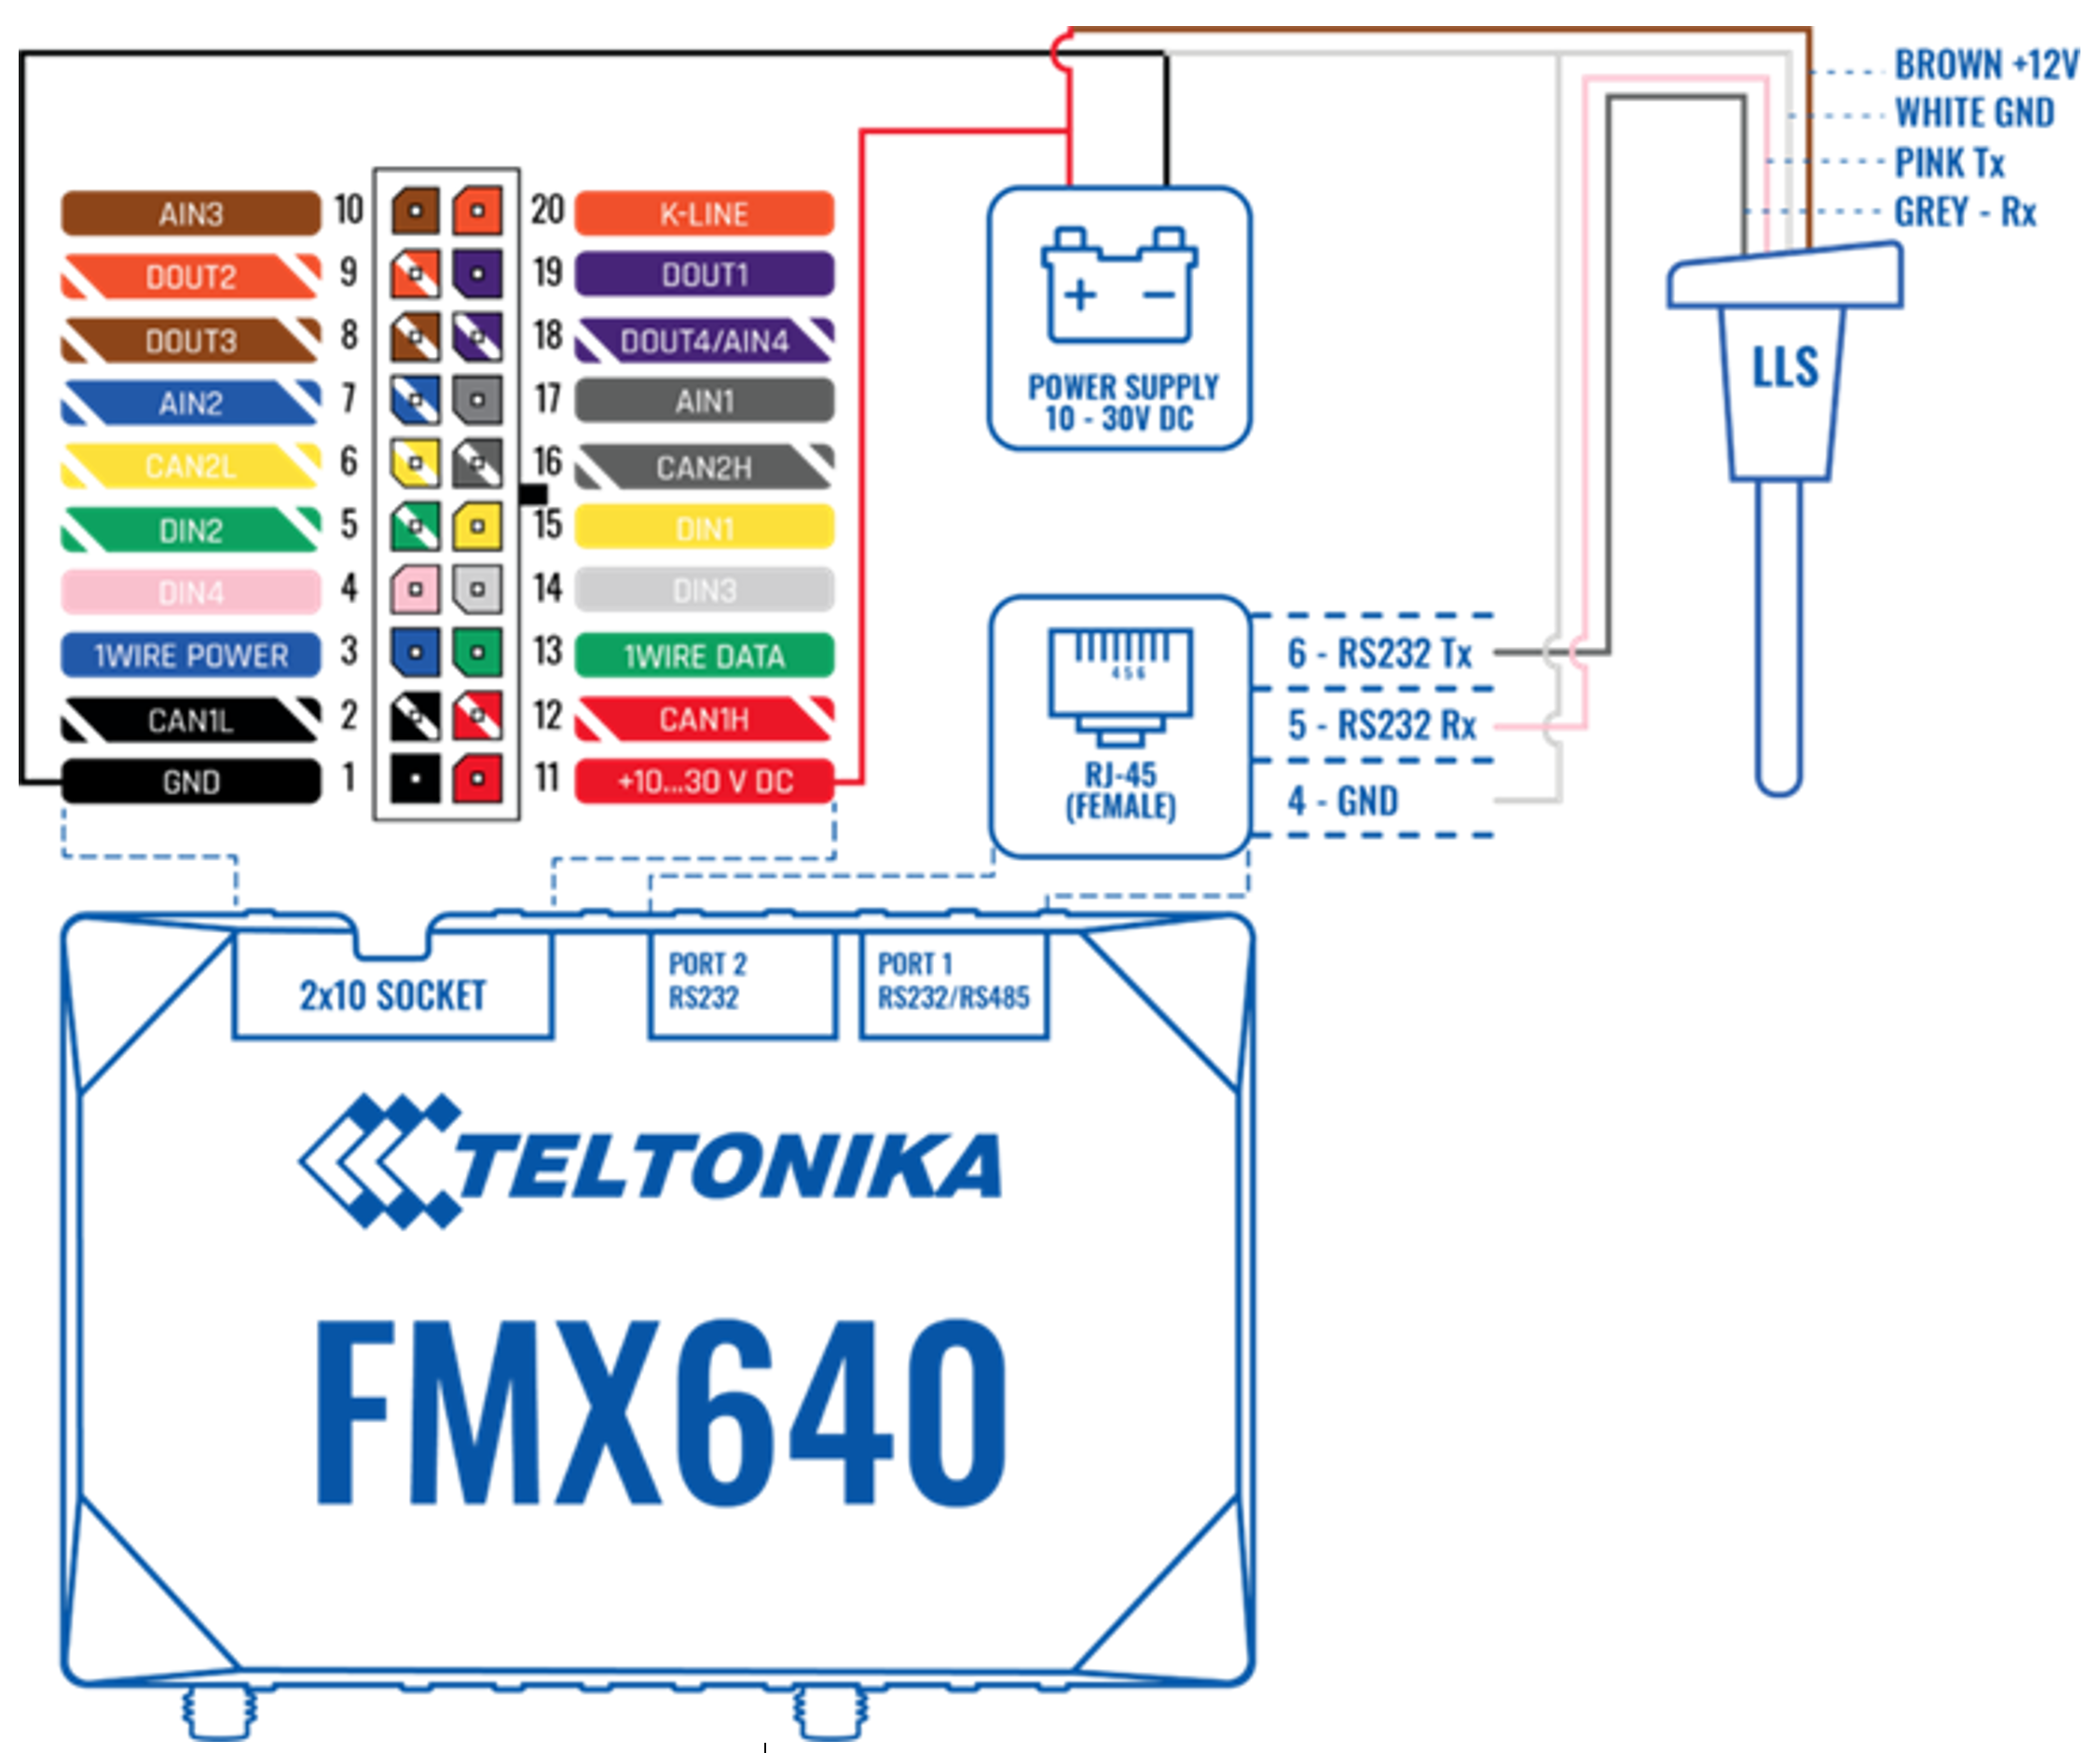
RS232 Digital Sensor Connection
Step 3: Connect FMC650 Tracker
3. Use the USB/2-USB cable or another suitable cable to connect the FMC650 tracker to your PC.*
*A cable with an USB/2-USB connector is not included in the FMC650 delivery pack.
4. Open Teltonika Configurator and wait for it to detect the connected device (1- 2 min). The configurator could restart after the recognition tracker.
Step 3: Network Configuration
5. When your device appears, enter the configuration window. 6. Go to the “System” tab.
 Set ignition input:
   * The ignition wire must be connected to **AIN1 input**.
   * Under Ignition Source, select the corresponding **AIN1 flag**.


