Profile Setup
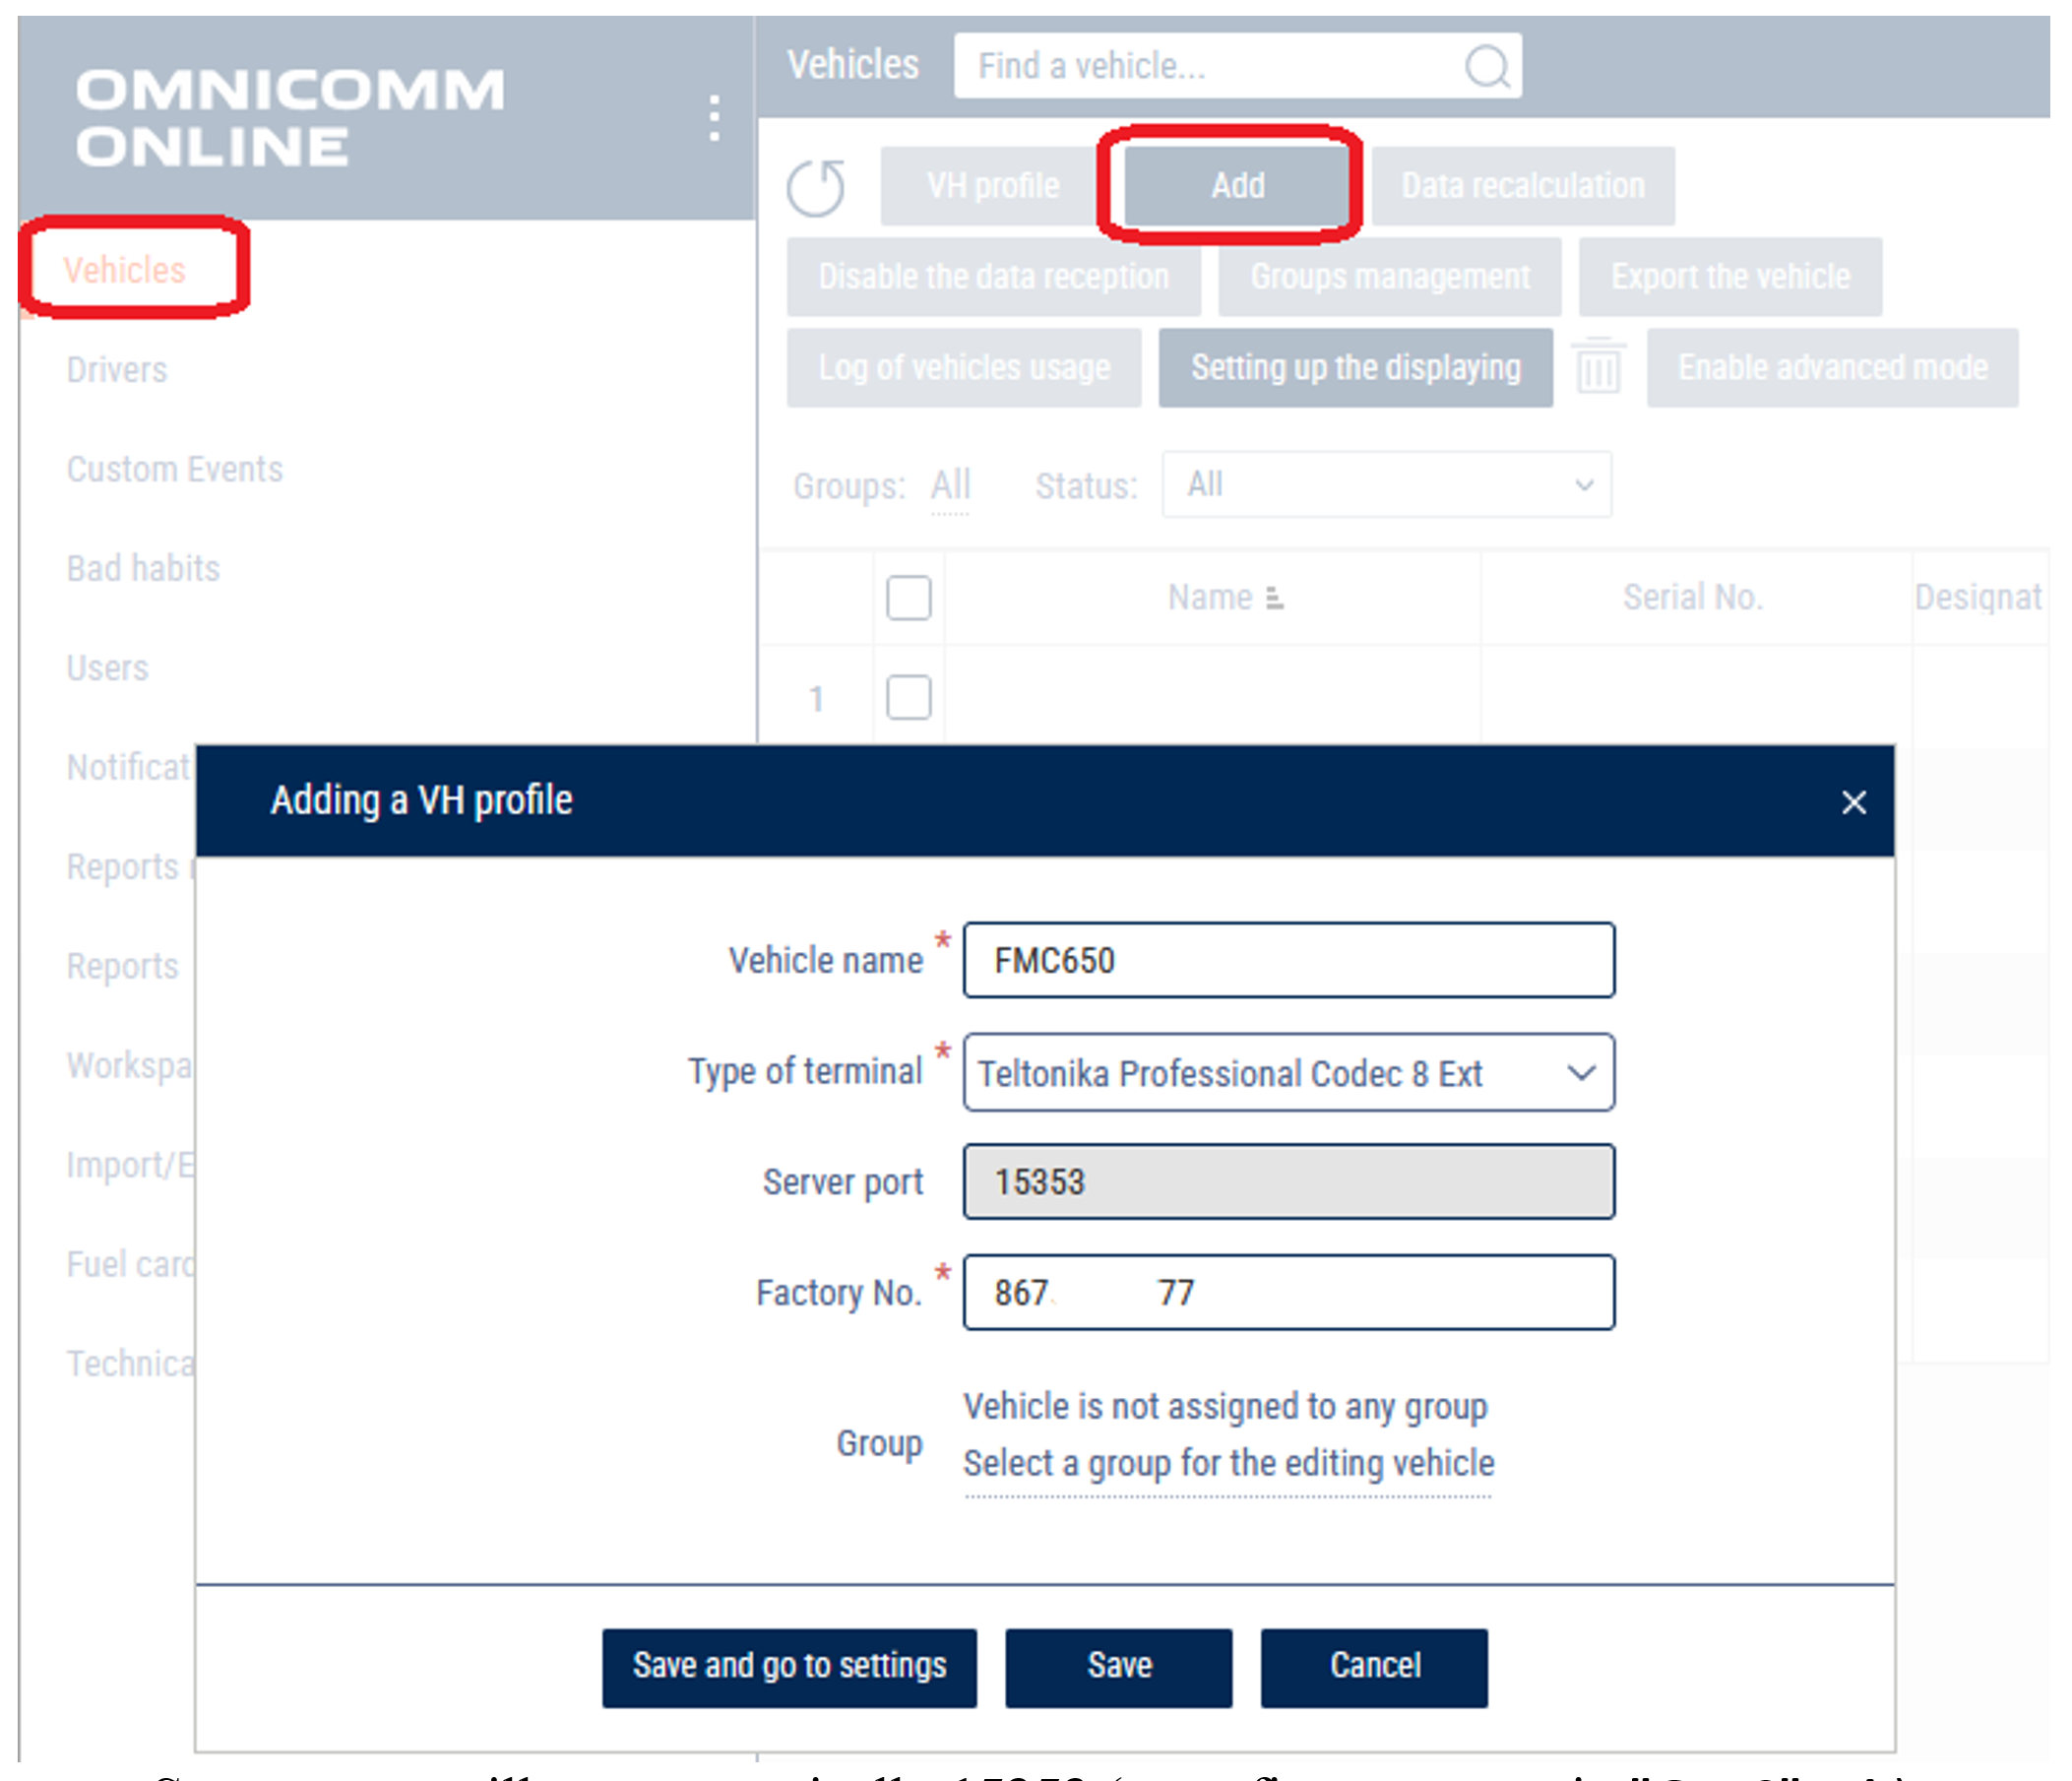
Log in in your account and open Administration-Vehicles tab
- Click Add.
- Choose Type of terminal: Teltonika Professional Codec 8 Ext
- Server port will set automatically 15353 (must fit server port in “GPRS” tab)
- Put your device's IMEI number in Factory No. field
- Put the name in Vehicle Name field (this name will be displayed in reports)
Click on created VH in the list and click VH Profile button
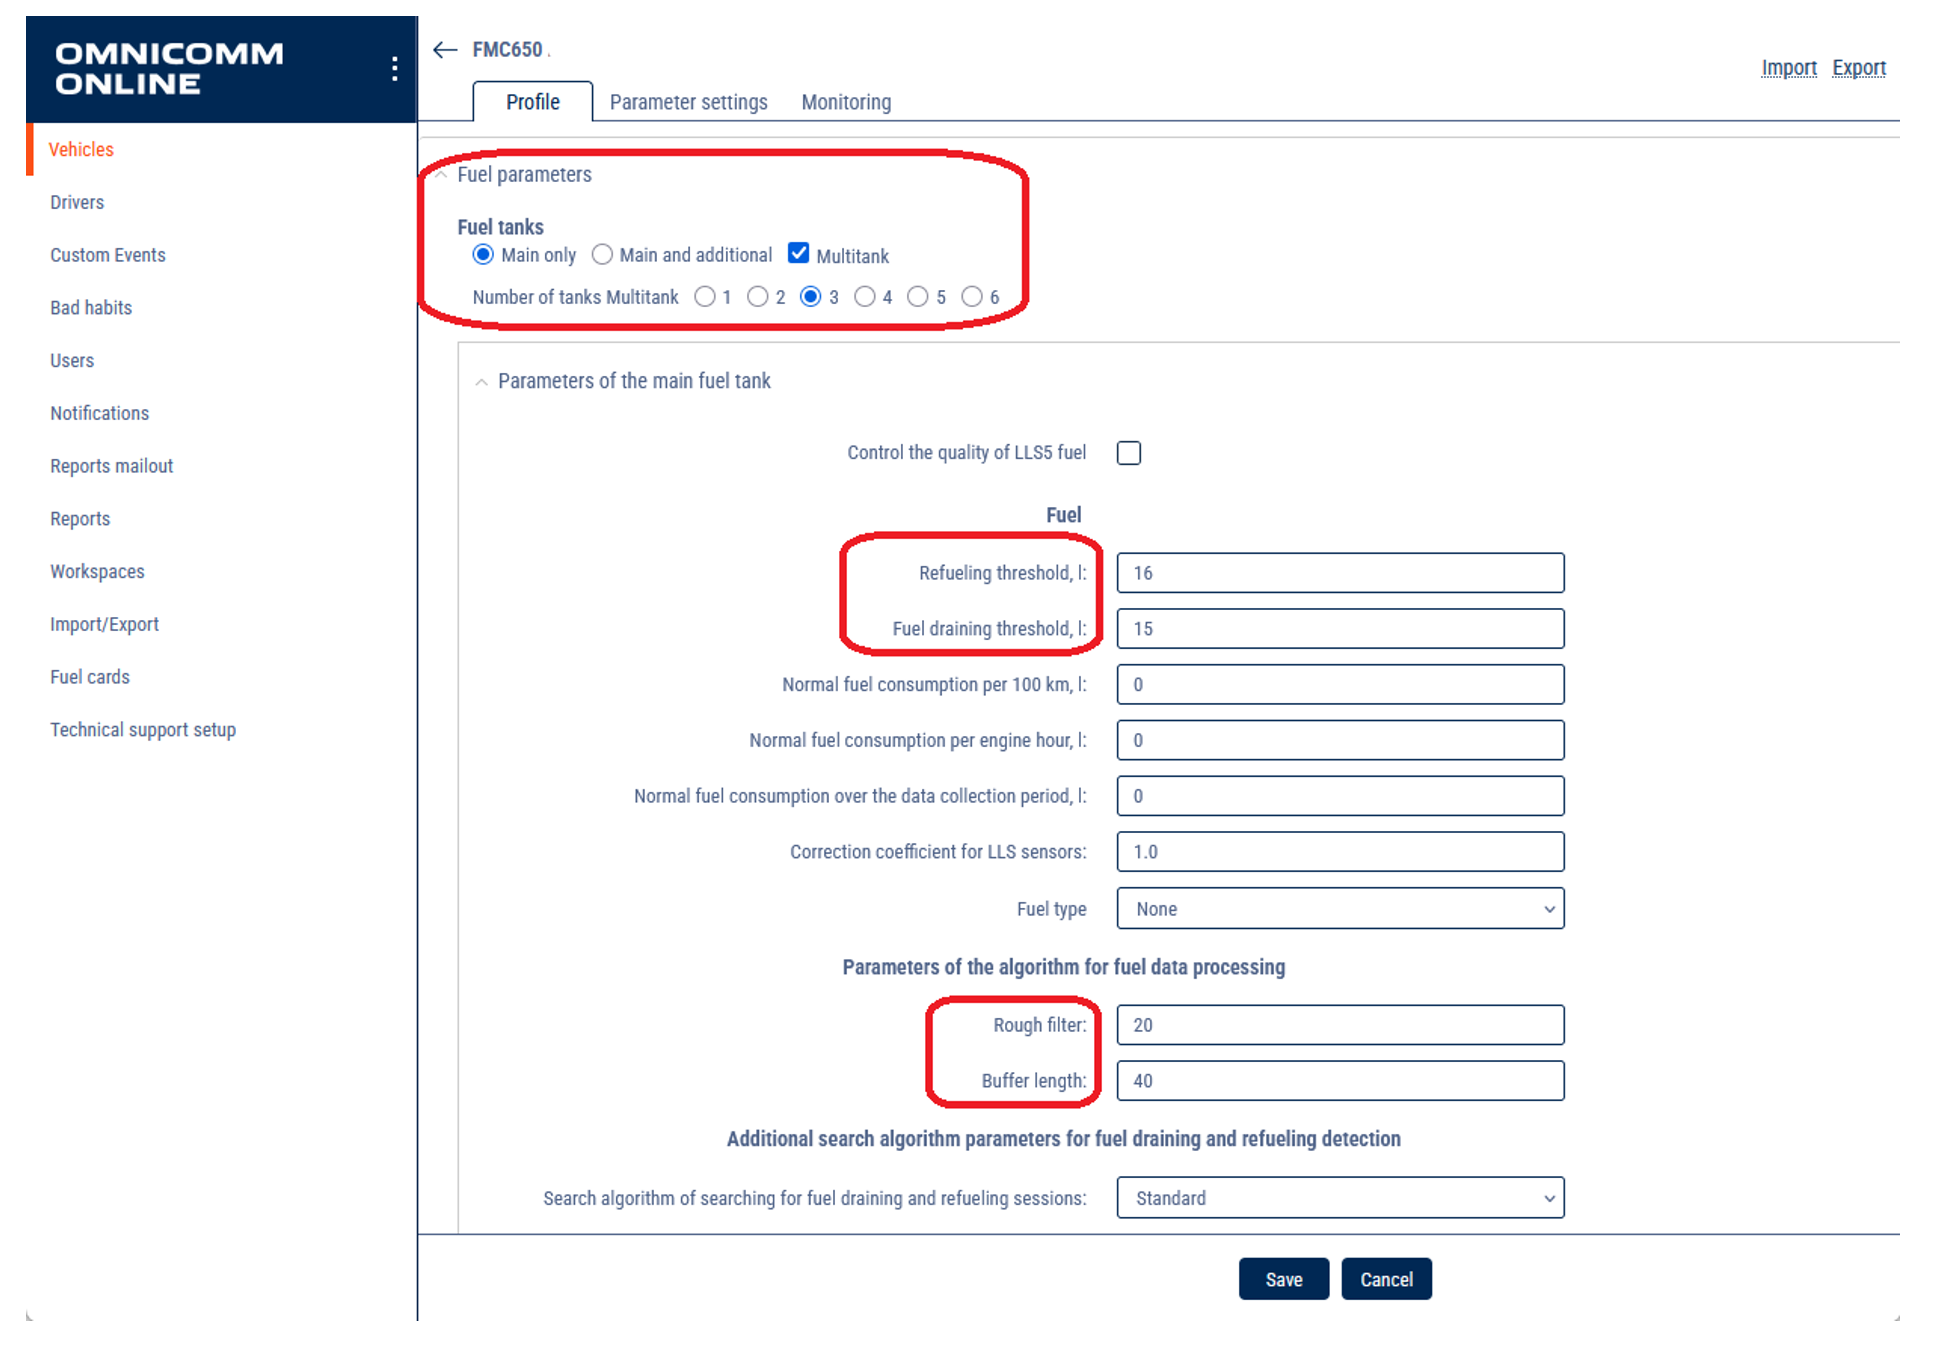
- Open Profile tab set up settings according manual: https://doc.omnicomm.ltd/en/omnicomm_online-administration/vehicle/add/profile_settings
- In the Fuel parameters section, choose a number of tanks and number of installed LLS.
“Fuel tanks” - Select the number of fuel tanks installed on a vehicle:
- Main only means only one fuel tank is installed on a vehicle - Main and additional means two fuel tanks are installed on a vehicle. For refuellers, the main tank is the reservoir, the additional tank is the engine fuel tank. For the vehicle, the main tank is the engine fuel tank, the additional tank is the fuel tank for the optional equipment. - Multitank means up to 6 fuel tanks are installed on a vehicle. Available to users with established rights to objects: Access to Multitank (see Adding and editing a user profile).
Examples:
- Main tank and single sensor: Common scenario. - Main tank and 2 sensors and more: In case of a complicated shape or impossibility to install a sensor in the center, two or more sensors are used for measurement level in a single tank. - Main and additional tank and 2 sensors: A Vehicle has 2 tanks, and each tank is equipped with 1 sensor. - Main and additional tank and 3 or more sensors: A Vehicle has 2 tanks, and each tank is equipped with 1 or more sensors. - Main tank + Multitank or Main and additional tank + Multitank is scenarios for fuel bowser, gas stations e.t.c. For each cistern or isolated compartment could be assigned one or several sensors.
For each tank set up * Parameters of the fuel tank:
- Set up Refueling threshold (recommended value 7% of tank volume, number depends on condition);
- Set up Fuel draining threshold (recommended value 7% of tank volume, number depends on condition);
- Set up Rough filter (depends on road condition);
- Set up Buffer length (depends on road condition);
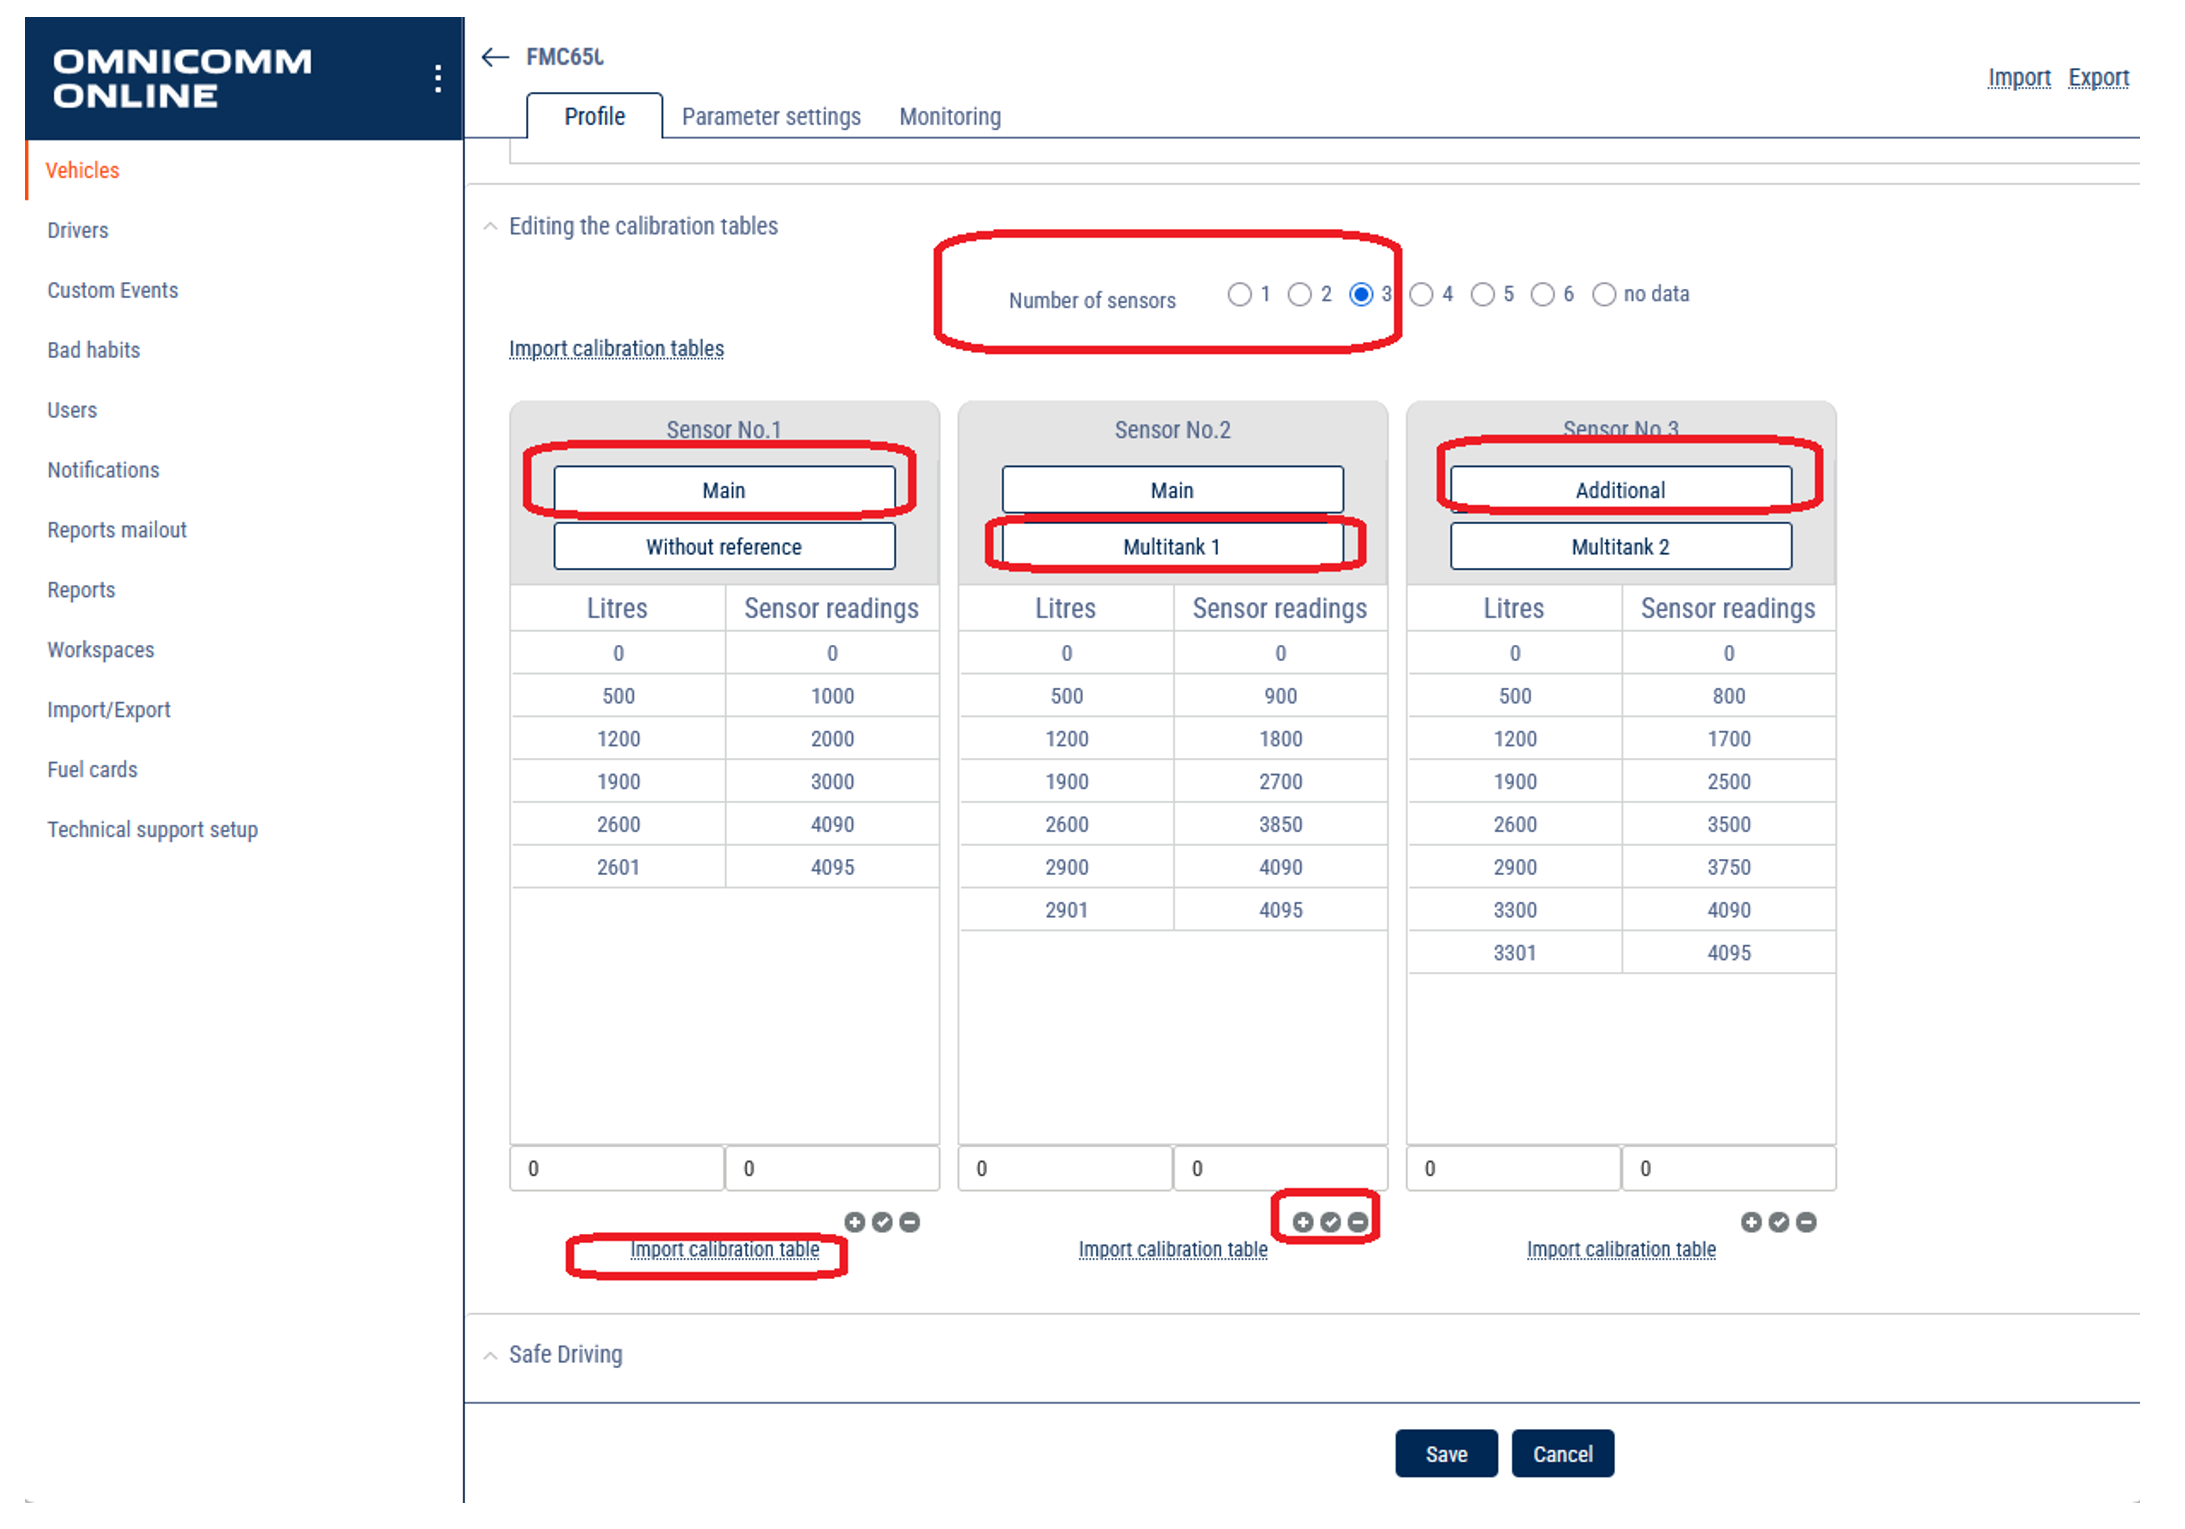
- In Editing the calibration tables, Import calibration tables or fill it manually and link sensors to the tanks.
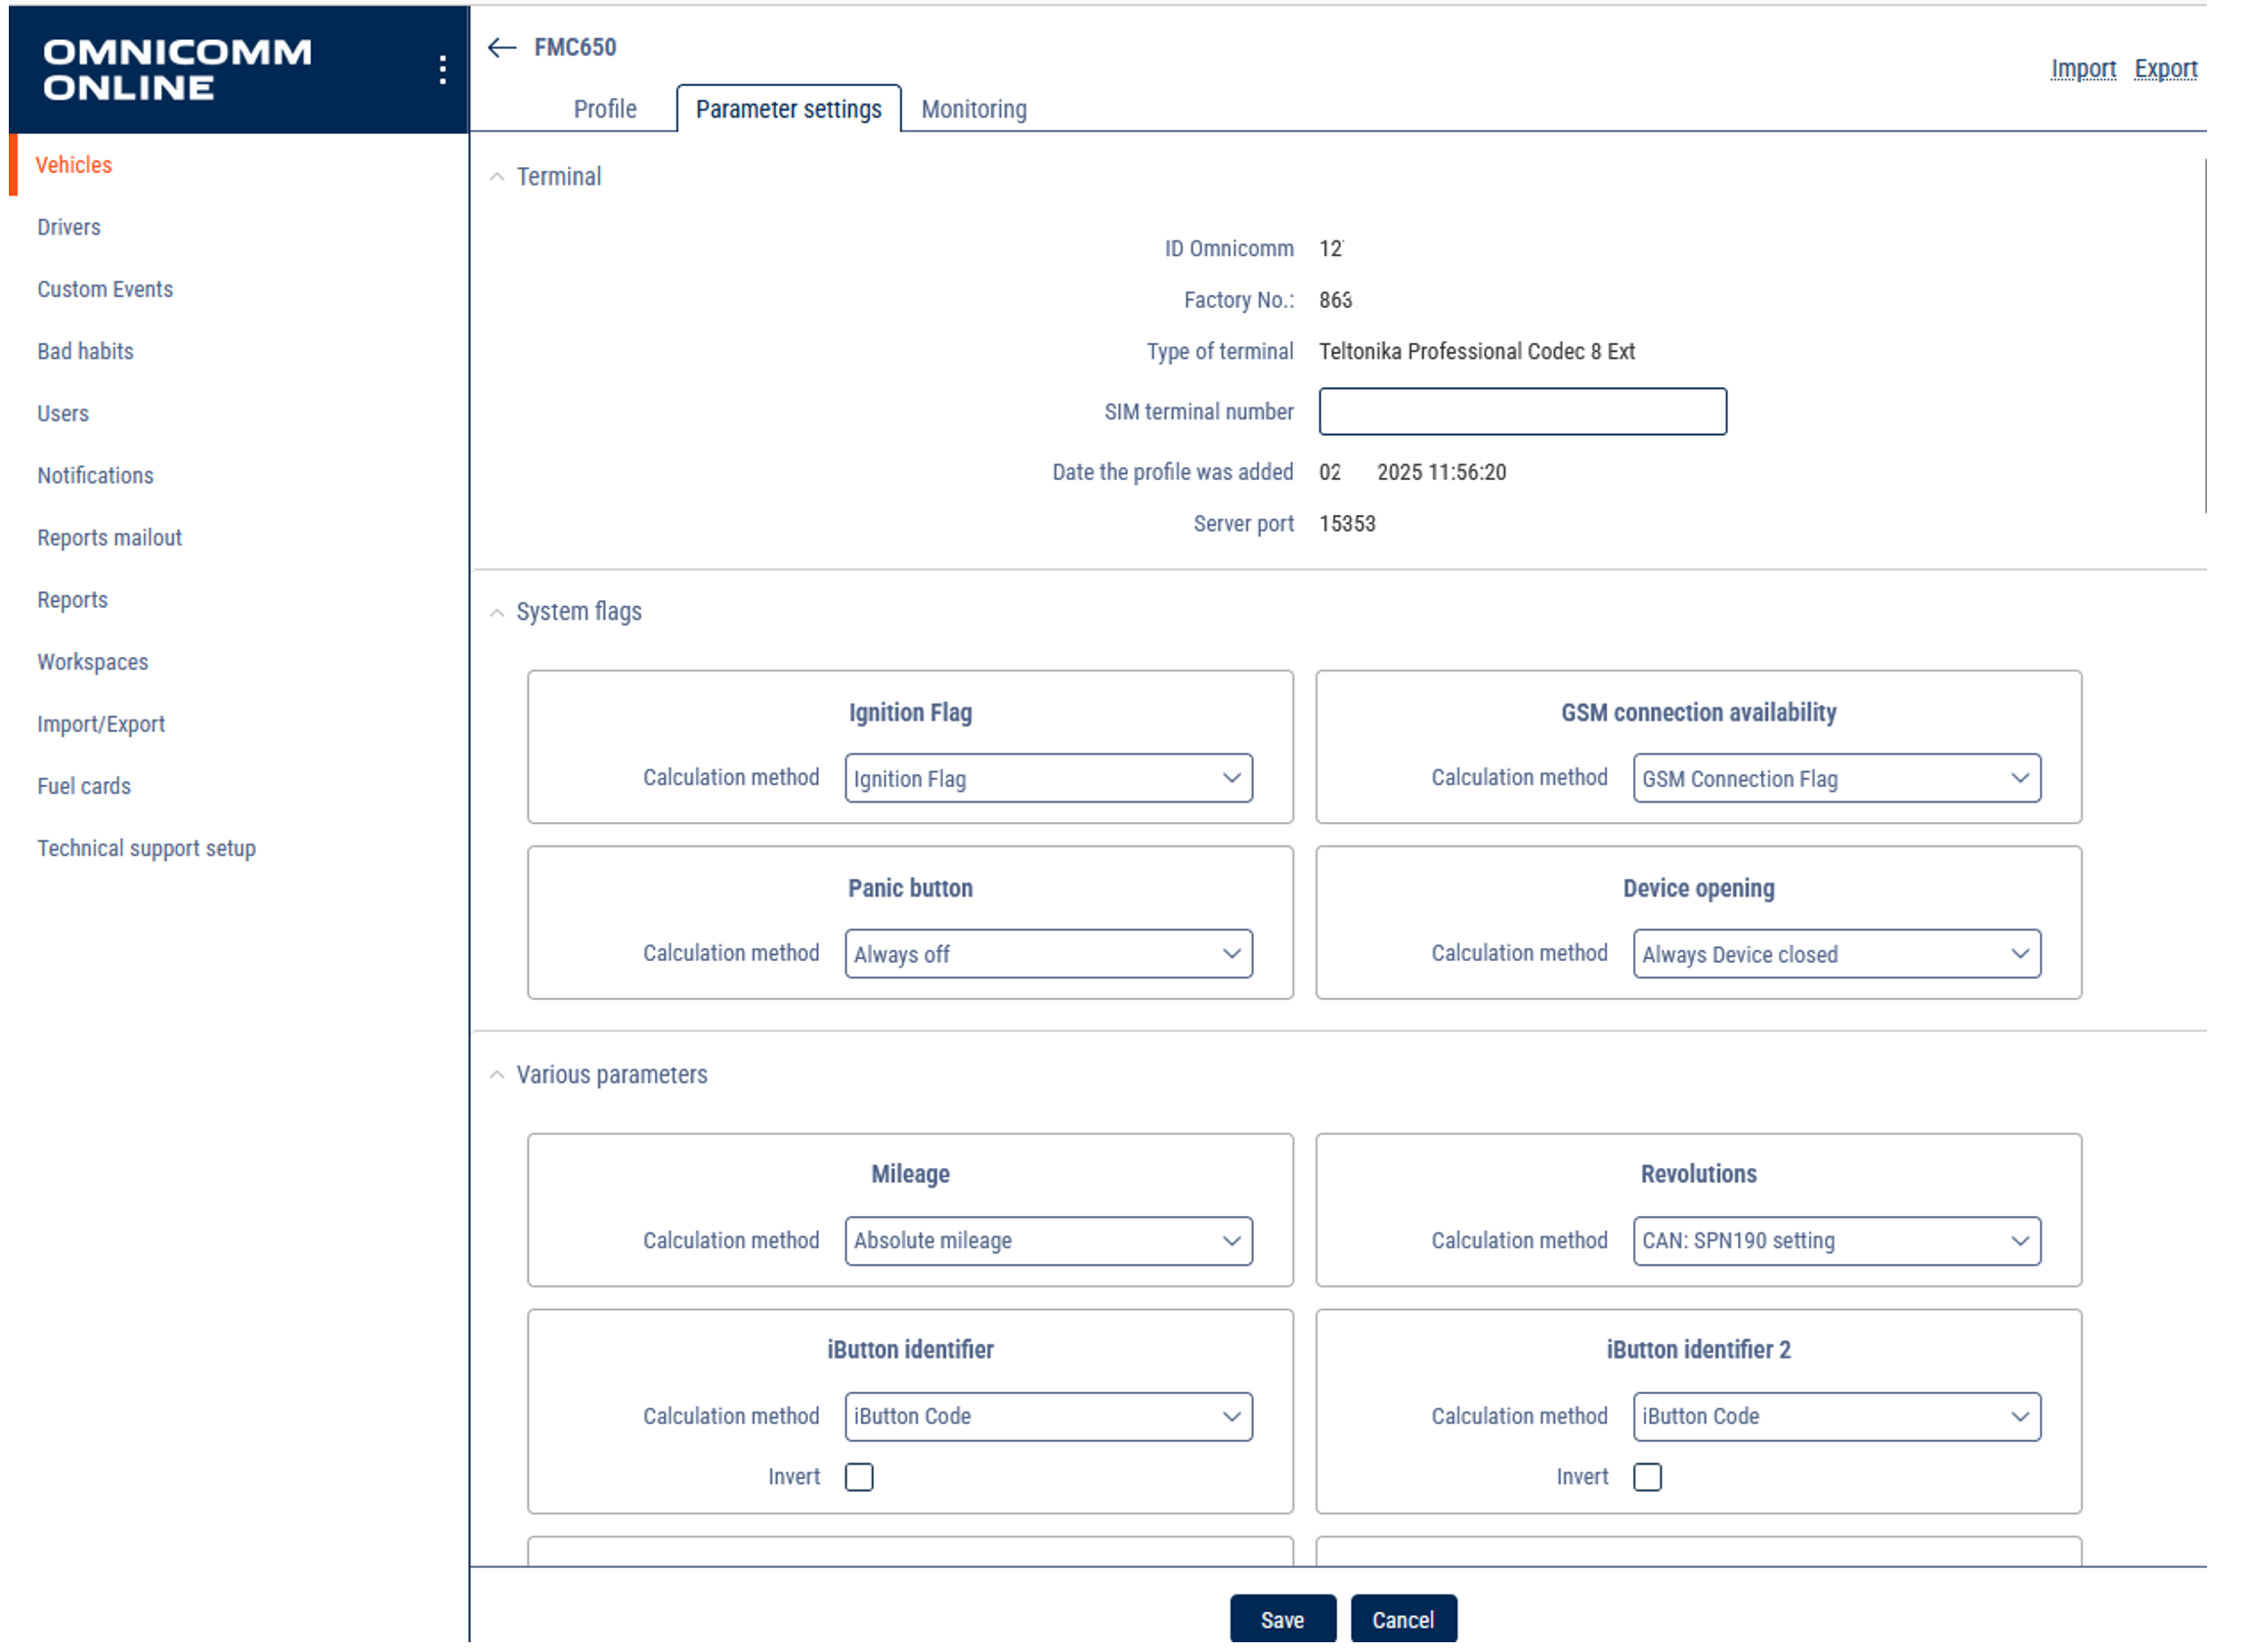
Open Parameter settings tab:
- Choose and link the necessary parameters.
For System flags:
- Choose GSM connection availability: Always-On connection.
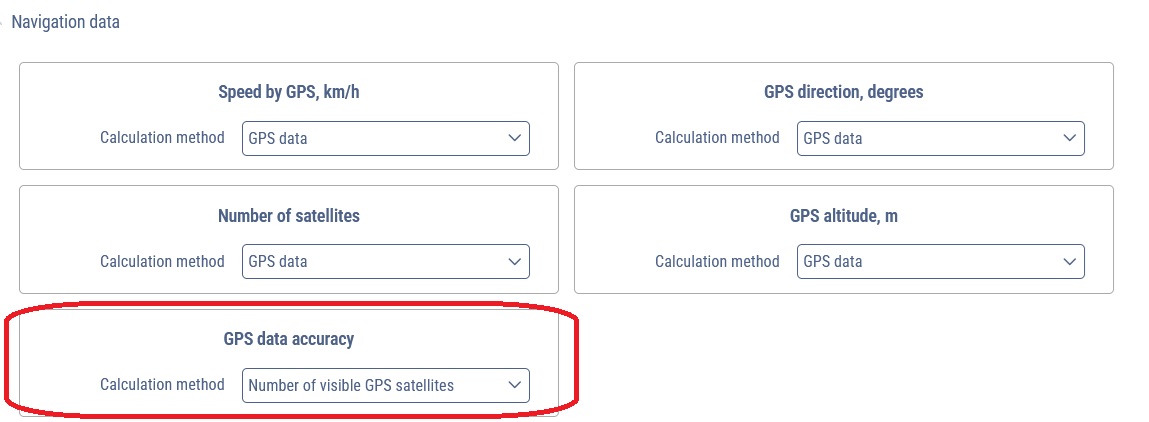
For Navigation data:
- Choose GPS data accuracy: Number of visible GPS satellites.
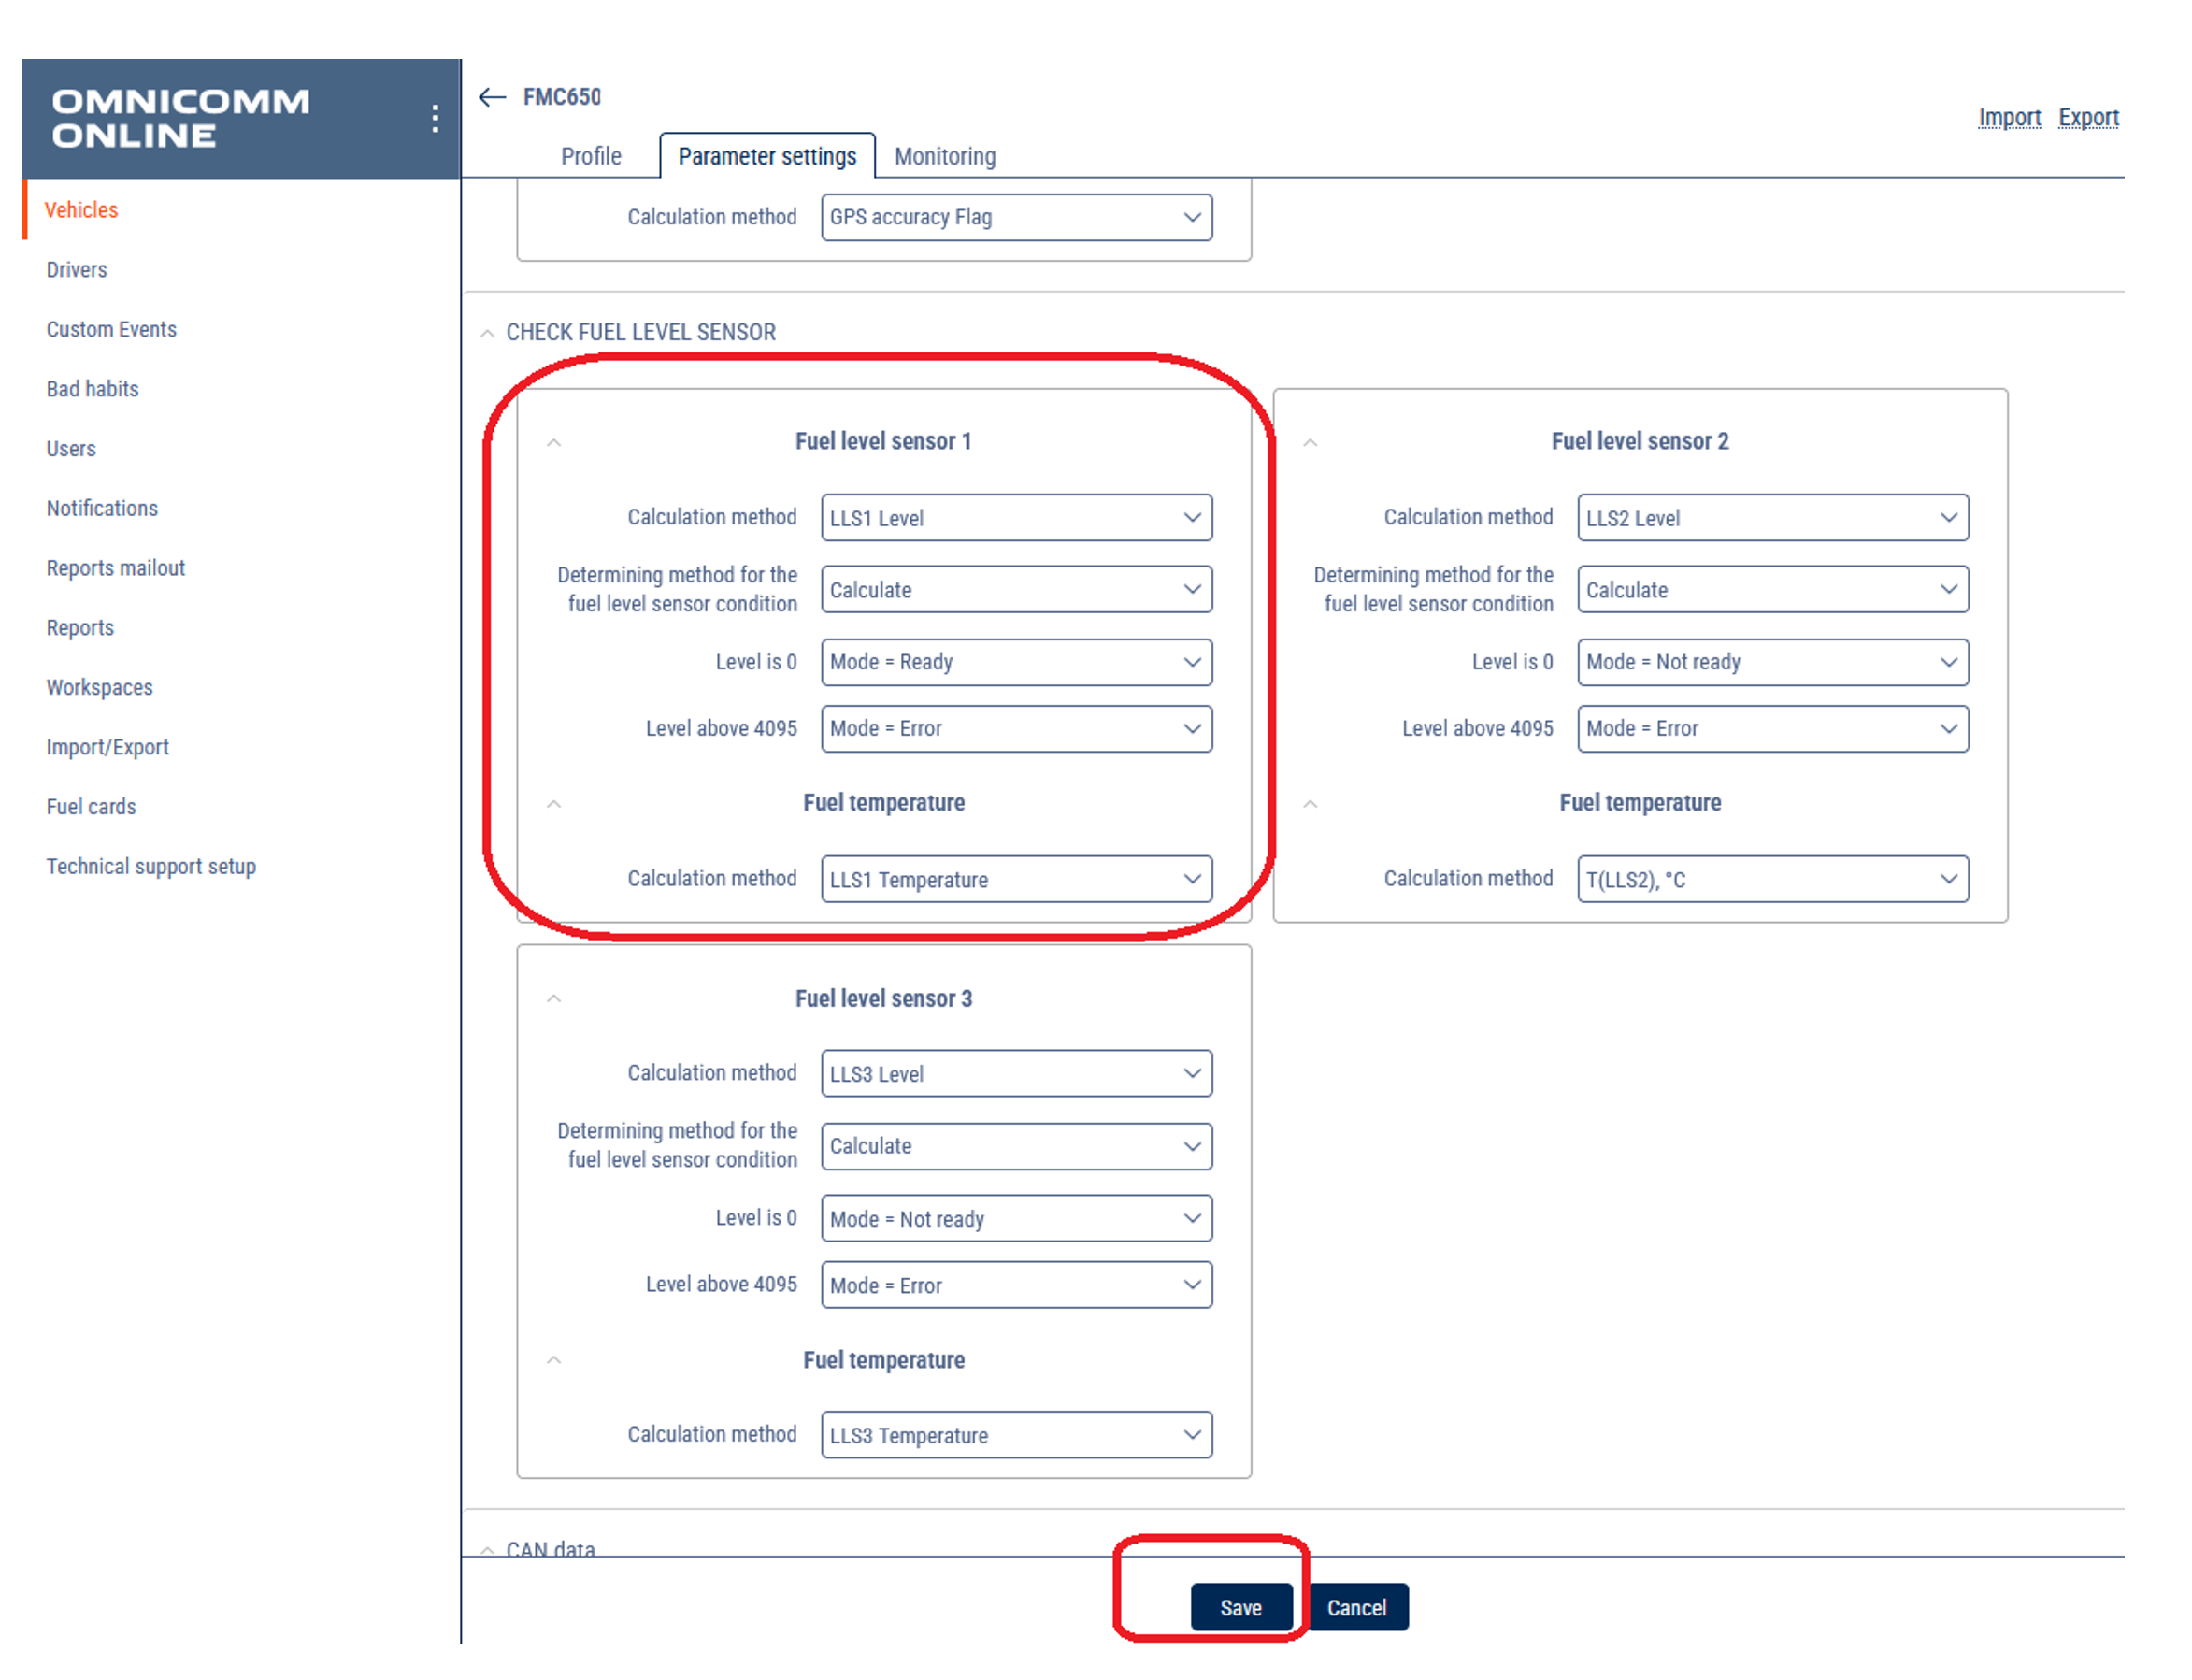
- For CHECK FUEL LEVEL SENSOR choose the source of data for each LLS:
For Fuel level sensor 1:
- Calculation method: LLS1 Level
- Determining method for the fuel level sensor condition: Calculate
- Level is 0: Mode = Ready
- Level above 4095: Mode = Error
- Fuel temperature Calculation method: LLS1 Temperature
For Fuel level sensor 2:
- Calculation method: LLS2 Level
- Determining method for the fuel level sensor condition: Calculate
- Level is 0: Mode = Ready
- Level above 4095: Mode = Error
- Fuel temperature Calculation method: LLS2 Temperature
Same for each sensor.
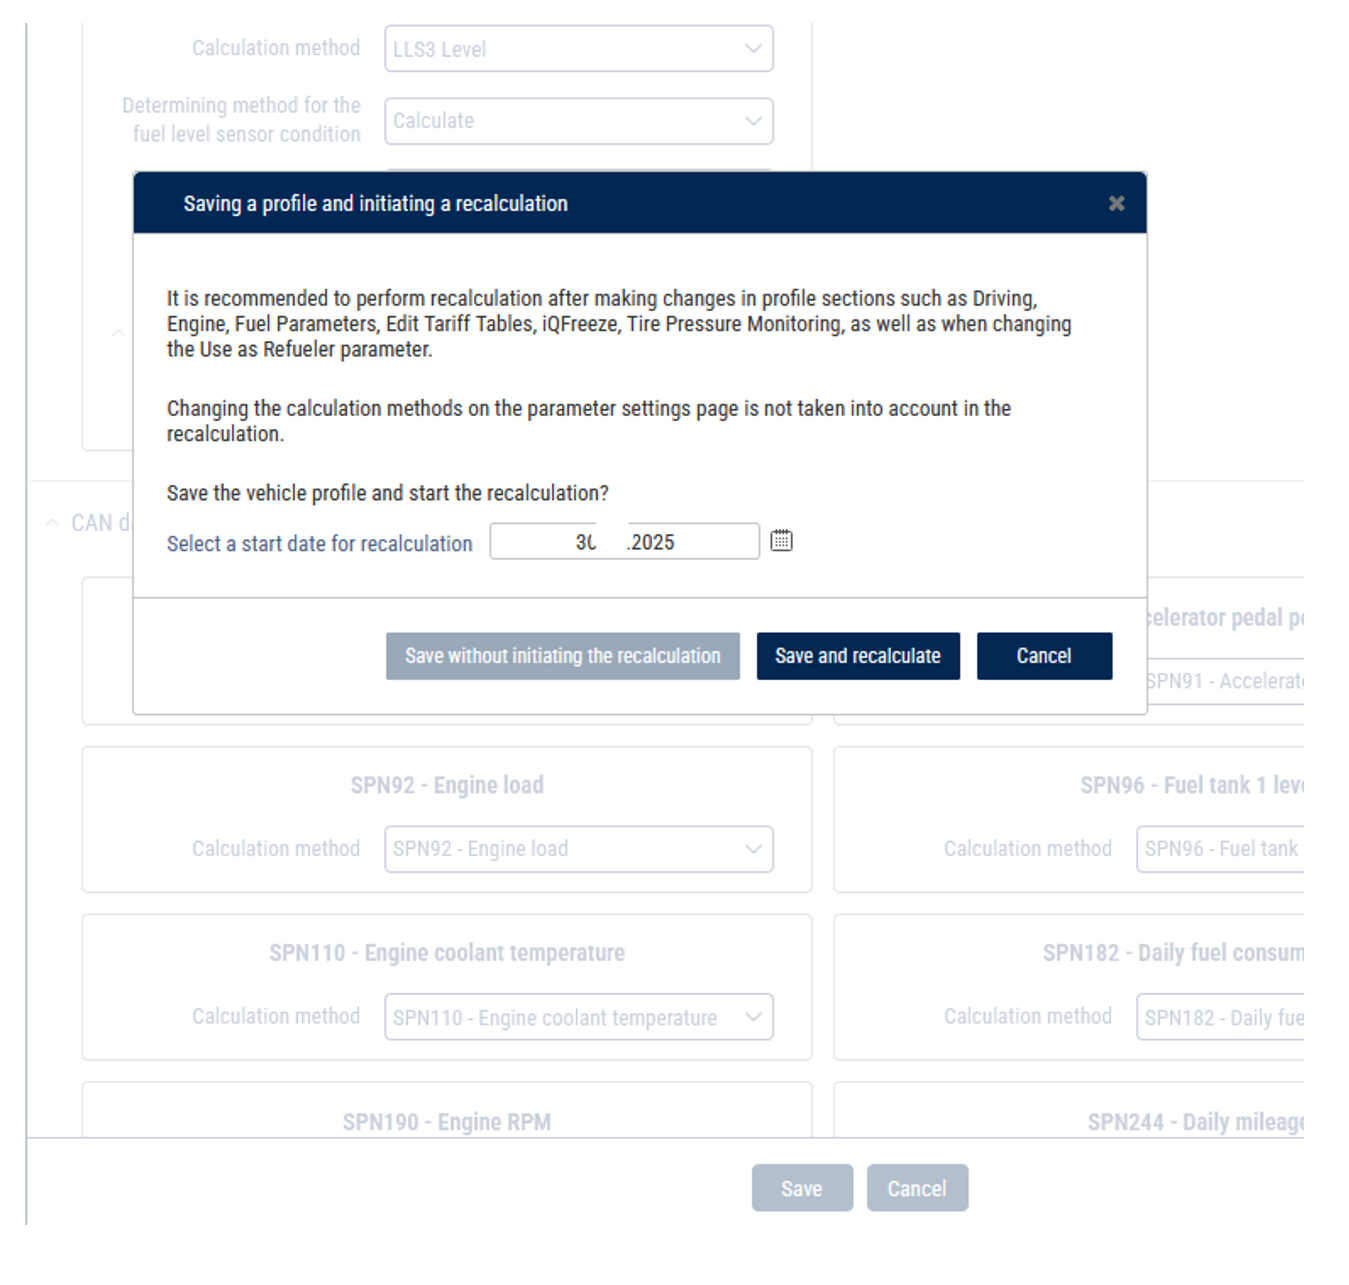
- Click Save and recalculate.
Choose VH in the list and click VH Profile button.
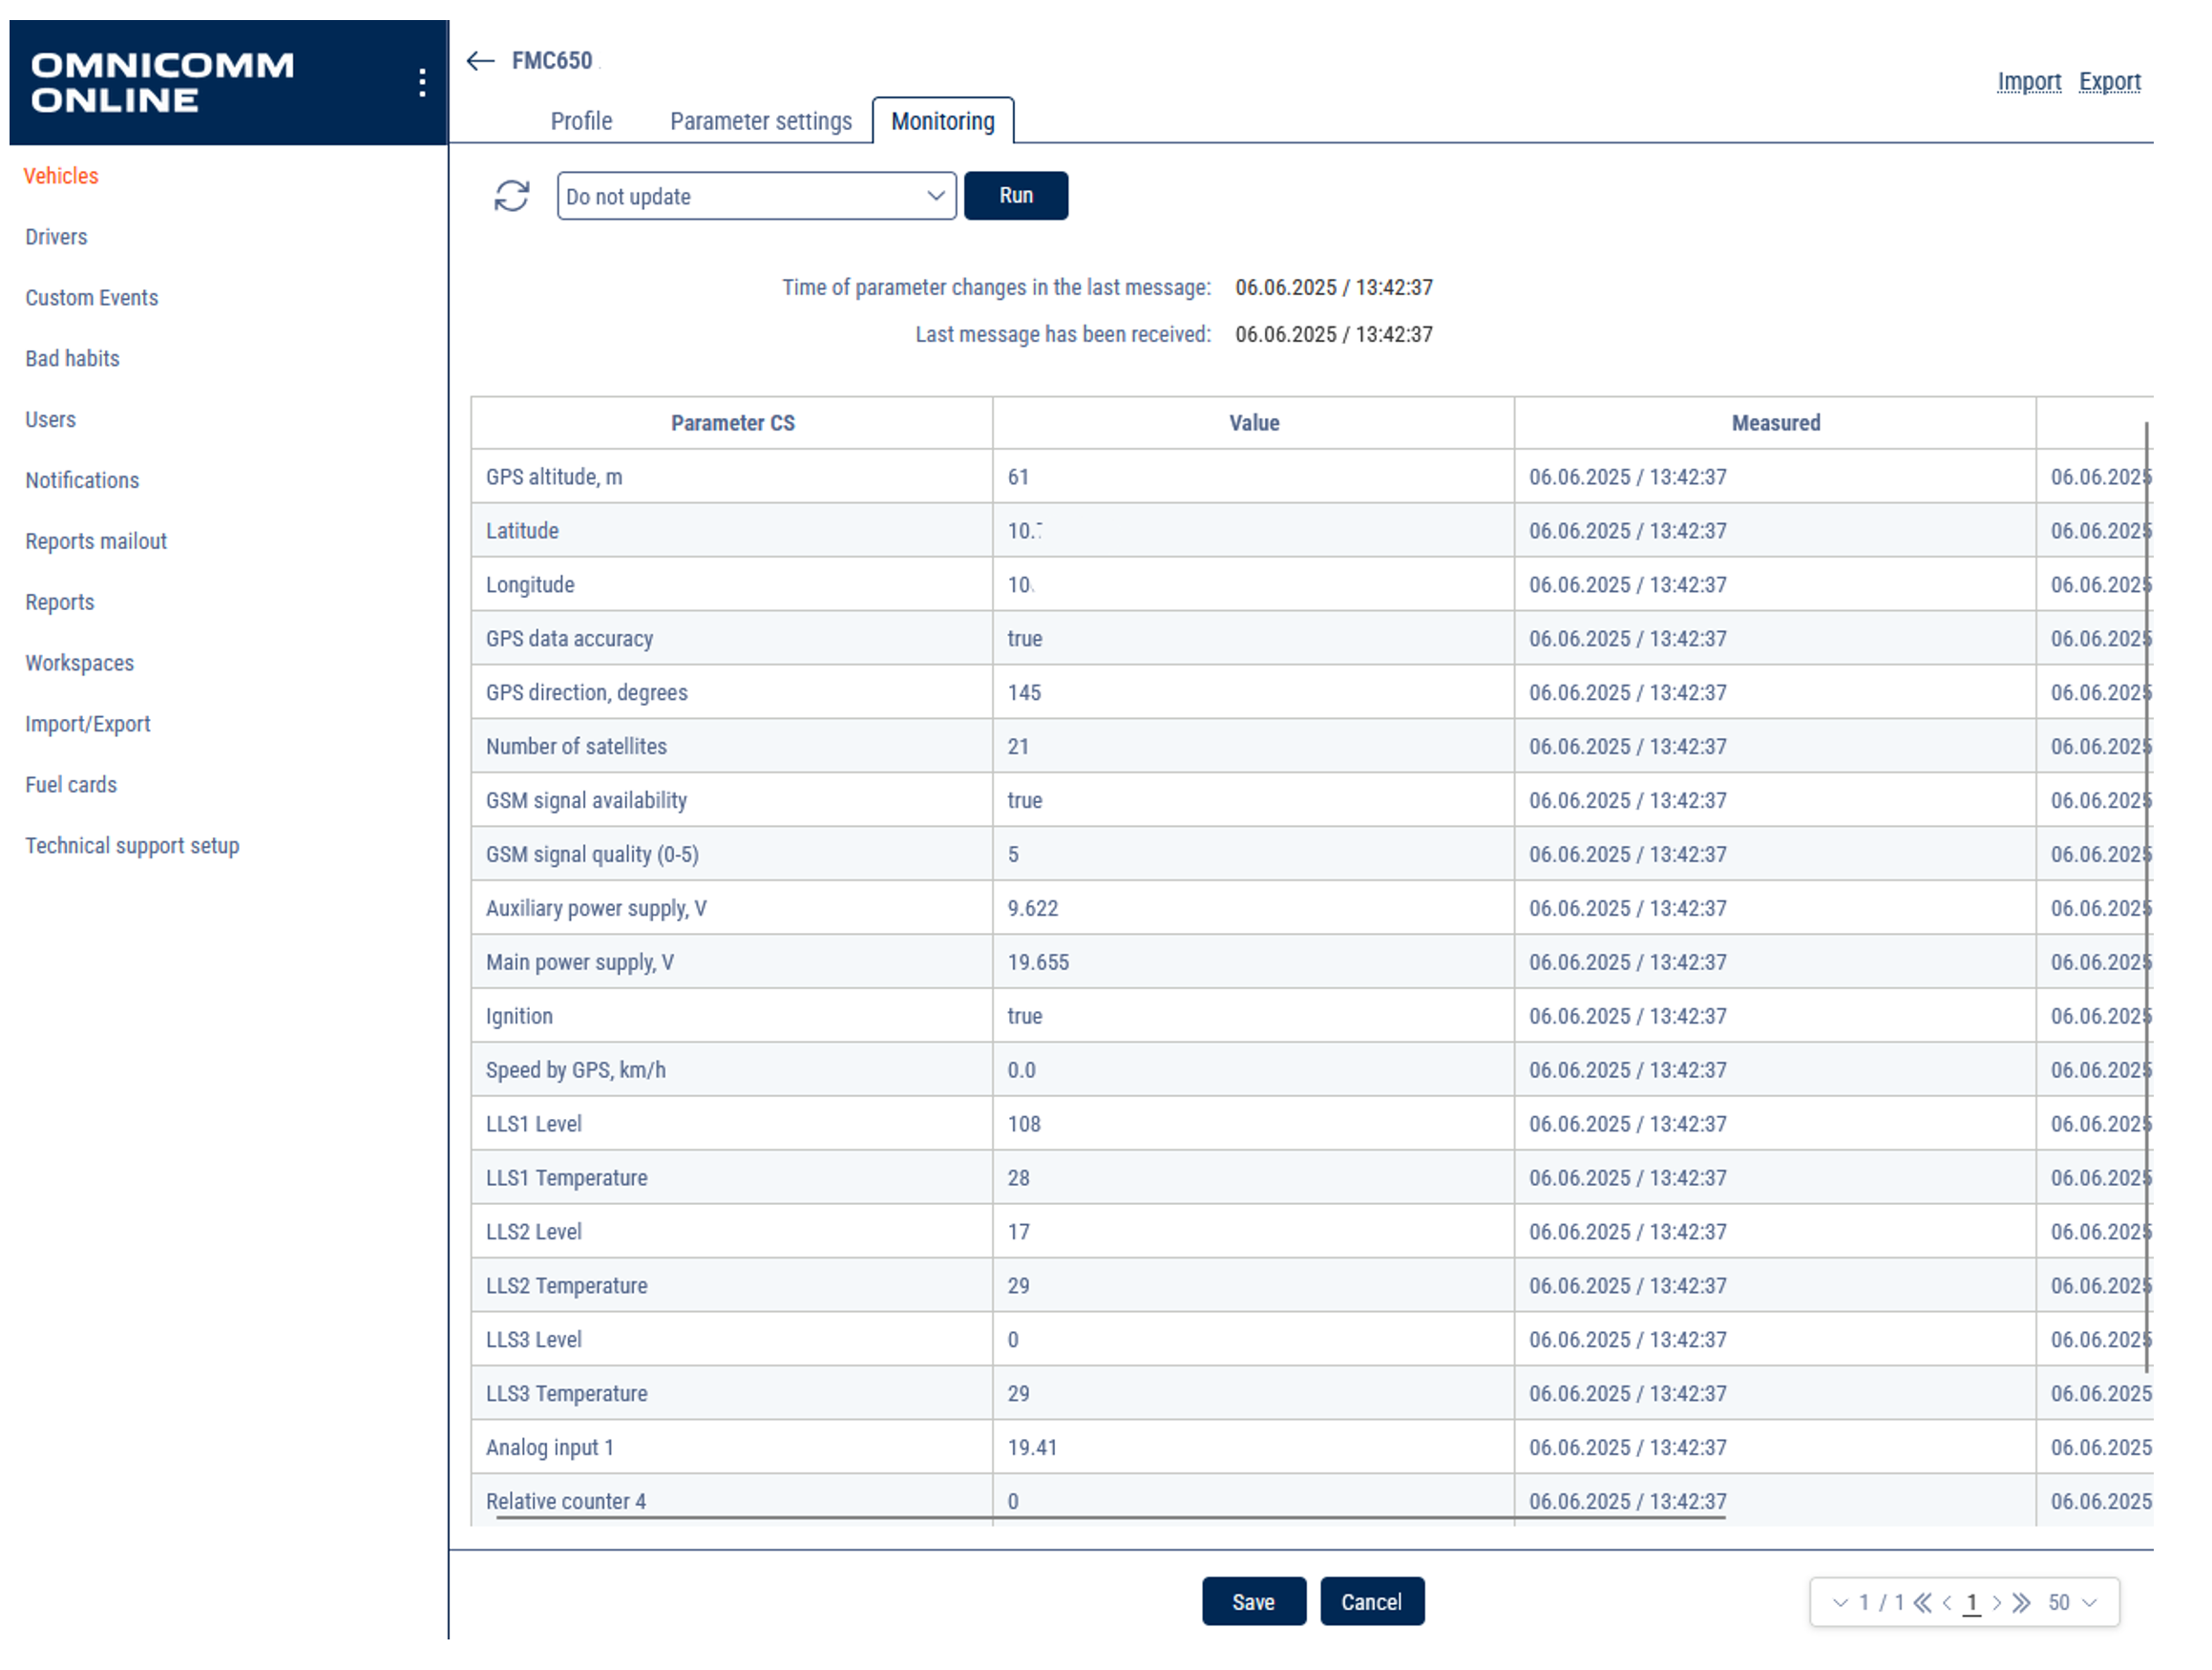
- Open Monitoring tab: check the received values.

