Driver Identification
In the “Settings” tab select the “Identification” section from the list.
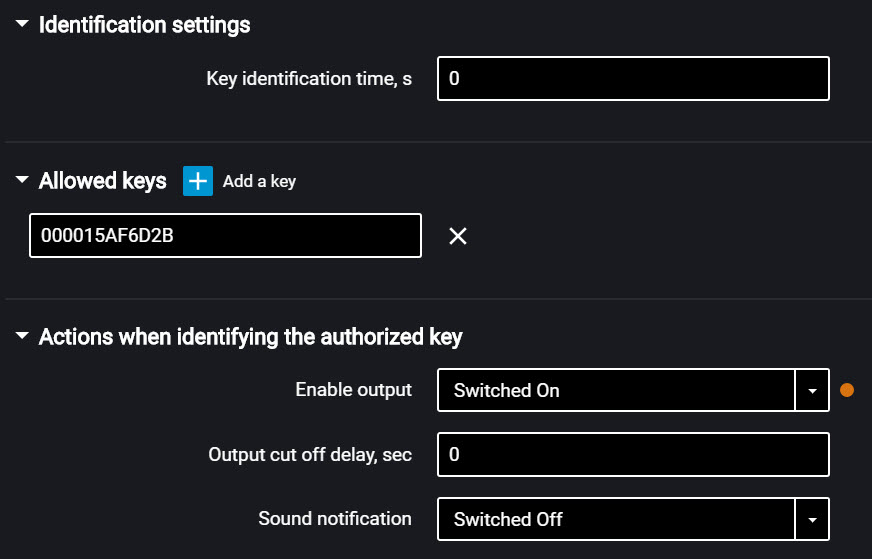
In the “Identification settings” section:
“Key/card identification duration” – specify the time value when iButton is applied, after which will be enabled the second digital output of the terminal. Possible values: from 0 to 60 seconds.In the “Authorized keys” section check the box and enter the iButton key numbers, which application will enable the second digital output. The key number is indicated in 6-byte format.
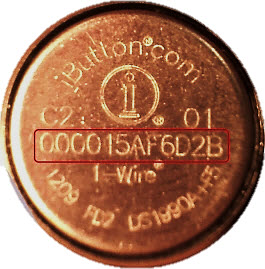
For example, for a key you must enter: 000015AF6D2B
If no key is indicated in this section, the events will be recorded for all applied keys.
“Output activation” – select “enabled” if you want to activate the second discrete output when the iButton / card authorized key is applied.
“Output cut off delay” – specify the time after disconnecting the iButton / card key from the readout device, after which the second digital output will be disabled. Possible values: from 0 to 3600 seconds.
If necessary, enable/disable the sound reminder of the driver’s authorization in the field “Enable sound reminder” – “Yes”/”No”, respectively.
iButton readout device connection and installation
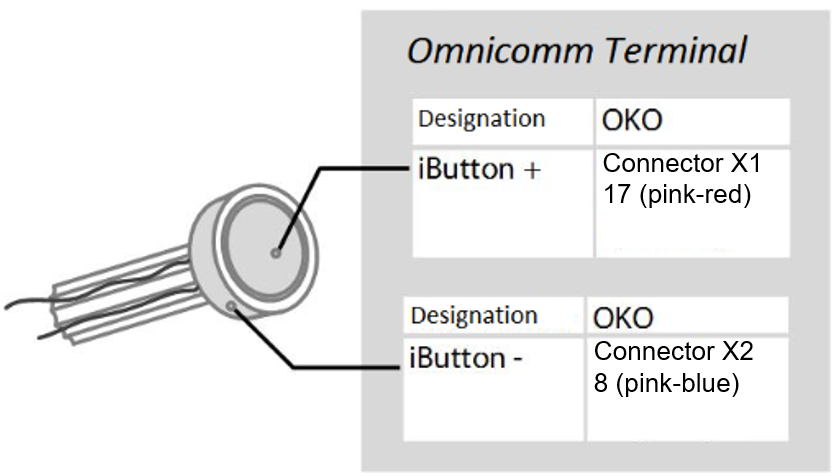
Determine the correspondence of the wire colours to the reader contacts, ringing out the wires and reader body contacts with each other using multimeter. Connect the iButton reader according to the diagram:
iButton reader must be installed on the vehicle front panel or in the service cover on the vehicle front panel.
At the installation site, drill a hole of Ø9 mm, install the iButton reader device, put on the sealing ring and lock washer.
Connect the sound emitter:
1. Connect the yellow-red wire of the sound emitter to the controlled output of the terminal, connect the brown wire to +12 V /(+24 V) vehicle network
2. Perform installation on/under an inclined or horizontal surface of the vehicle cabin front panel, fixing it with screws (self-tapping screws) or glue
3. At the installation site, when using screws, drill holes as shown in figure:
4. Mount the sound emitter on the prepared surface and fix.


