Track
The “Track” report allows a user to view of one selected VH for the selected time.
1.Select a VH.
2.Select a period of time for report generation.
3.Press “Add report” button and select “Track”.
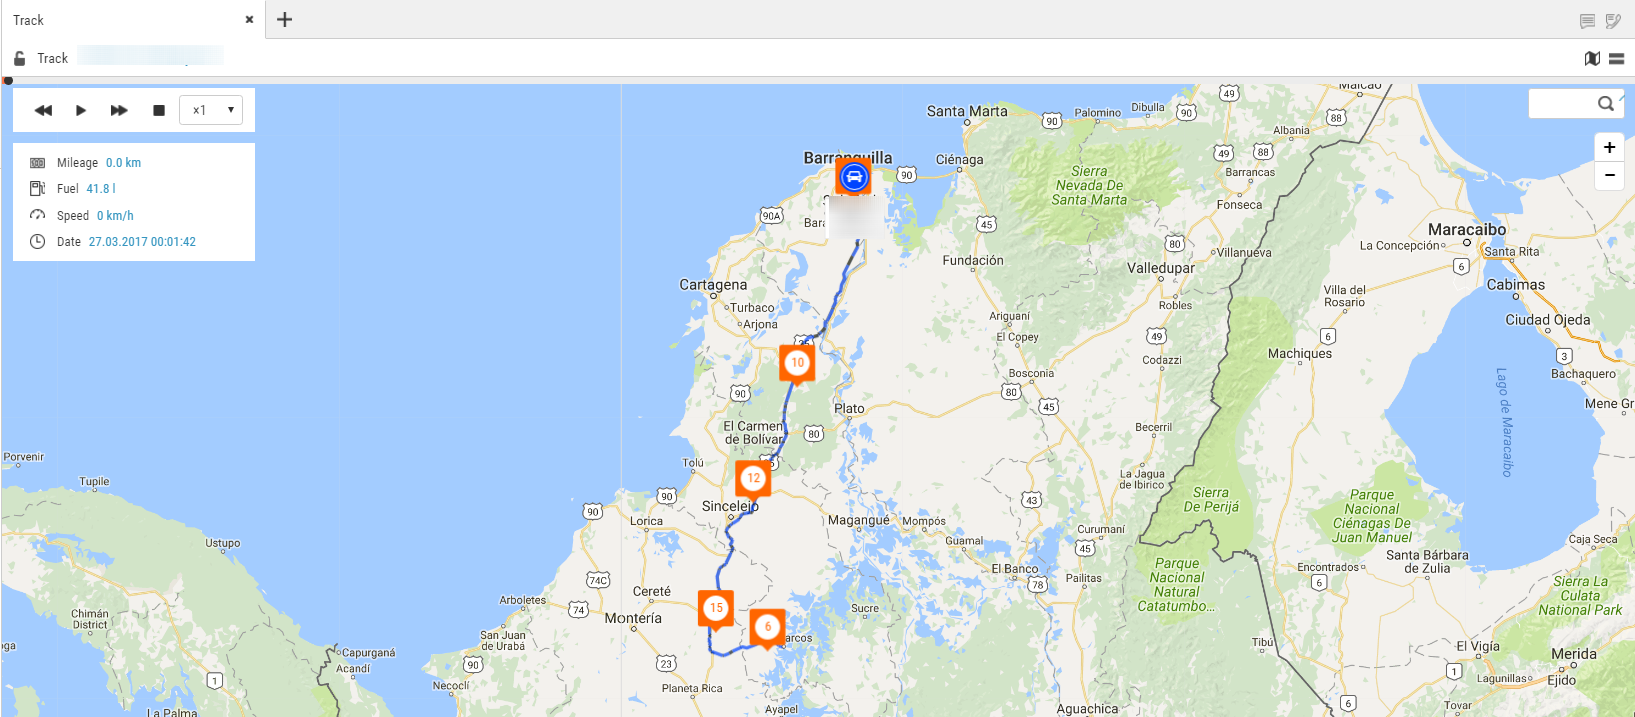
A map with the VH's track for this period of time will be displayed in the program window:
To display a tooltip press the icon ![]() .
.
The tooltip contains the following information:
•“Date” is the date and time the VH presence in the selected part of the track.
•“Registration number” is the VH name.
•“Speed” is a speed of the VH in the selected place of the track.
•“Address” is the adress where the VH was found in the selected place of the track.
•“Mileage” is a VH mileage strating from the track beginning.
•“Fuel volume in the primary tank” is a volume of fuel in the primary tank. It is not displayed, if the fuel level sensors are not connected or “0” number of sensors is set in the VH profile settings. The units of fuel parameters measurement (liters or gallons) shall be given according to the server settings.
•“Fuel volume in the additional tank” is a volume of fuel in the additional tank (if there is such). It is not displayed, if the fuel level sensors are not connected or “0” number of sensors is set in the VH profile settings. The units of fuel parameters measurement (liters or gallons) shall be given according to the server settings.
•“Ignition” is a position of the ignition key (on/off) in the selected place of the track.
•“GSM” is the state of GSM module (on/off).
•“GPS data” are correct or incorect data. If the data are incorrect, the date and time of receipt of the certain data are displayed.
•“Total mileage as per CAN” – total vehicle mileage according to CAN bus data.
•“Current auxiliary equipment readings” - current value or status of the auxiliary equipment.
•“Driver” – driver registered on the vehicle.
The format of the address and the content of the pop-up information about the vehicle can be configured in the object tree (see Object Tree Settings).
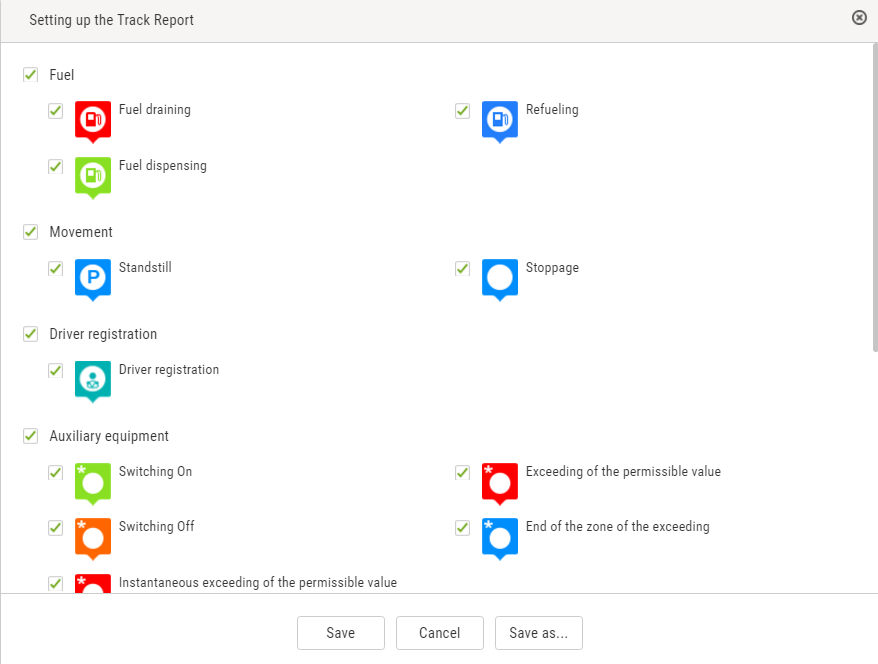
To set up the report, press the right mouse button and select “Report settings”:
Measuring parameters between two points of the track
1. Right-click on the track and select “Track Section Parameters”
2. Select the starting point for the measurement on the track
3. Select the end point for the measurement on the track. To clear the selection, click anywhere on the map (not on the track).
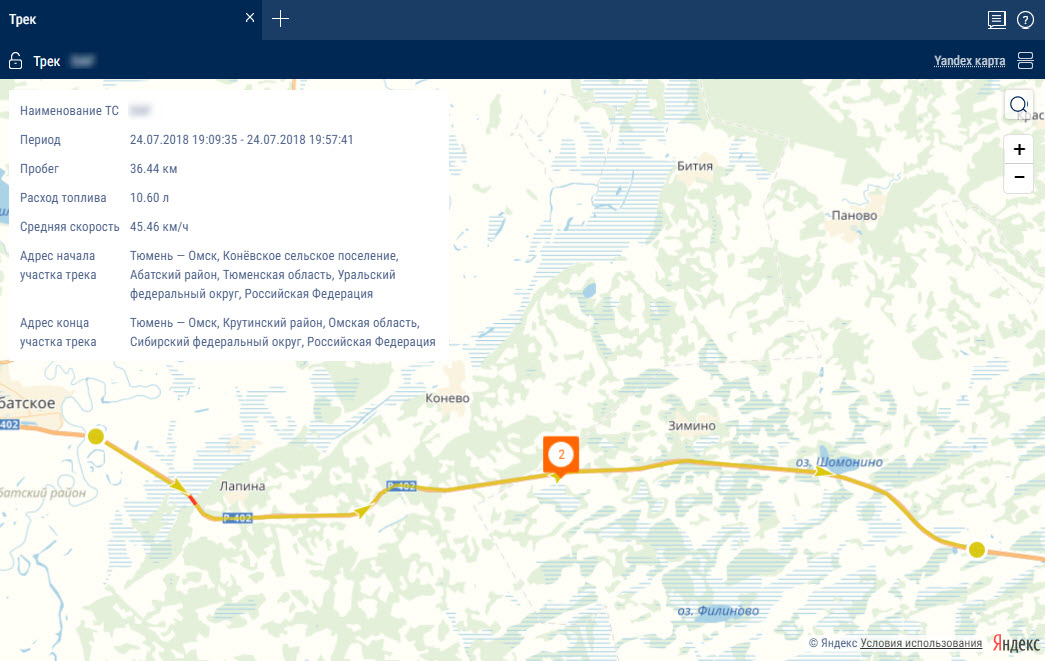
For a section of the track, the following information is displayed:
- Vehicle name
- Period
- Mileage
- Fuel consumption
- Average speed
- Track section start address
- Track section end address
Exit the parameter measurement mode by pressing Enter or Esc.
To display track points, right-click and select “Track Detailing”.
The map in OpenStreetMaps mode has a feature enabling additional painting of necessary section of maps, please see www.openstreetmap.org for details.
If it is required to zoom in the map section, select it with the mouse cursor continously pressing “Shift” button.
To create a geofence using a track it is required to use the map control panel.
If you select one vehicle and a report period of 7 days or fewer, track points corresponding to all rows of the “Log” report will be displayed (at maximum scale).


